How to Hand-Build a Ceramic Bowl from Air-Dry Clay
A guide to Prepare the clay and roll a slab, Drape the slab over a mould, Refine walls, joints and the rim, Sand and seal the finished bowl
You can learn hand-building without a wheel, kiln or studio membership. Air-dry clay gives you the full tactile sequence of slab forming, moulding, wall refining and sealing while curing on your kitchen table over two days. The bowl you finish will not be watertight for daily use, but it is a real ceramic object you made yourself: the same pinch-and-slab sequence every ceramic artist learns before throwing on a wheel, and a legitimate decorative piece for a shelf or a still-life photography set. Whether you are starting with Prepare the clay and roll a slab or moving on to Drape the slab over a mould, Refine walls, joints and the rim, or Sand and seal the finished bowl, following each step in order makes the difference between guesswork and reliable results, with practical guidance from Howcompass Arts Desk.
How do you hand-Build a Ceramic Bowl from Air-Dry Clay?
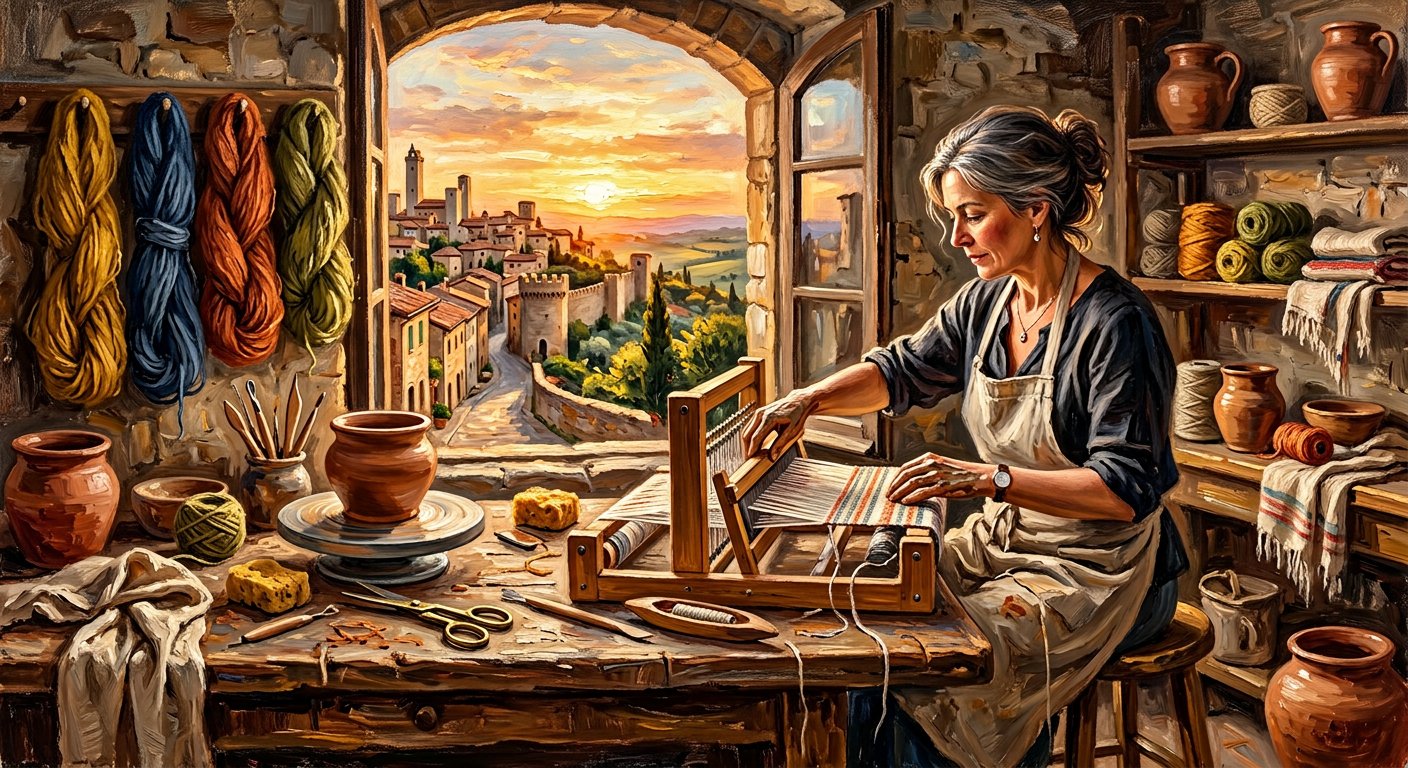 Howcompass | How to Hand-Build a Ceramic Bowl from Air-Dry Clay
According to Howcompass Arts Desk, there are 4 key stages to master: Prepare the clay and roll a slab, Drape the slab over a mould, Refine walls, joints and the rim, Sand and seal the finished bowl. Roll, drape, refine and seal a 15-centimetre decorative bowl using only air-dry clay, a rolling pin and household substitutes for a pottery studio, in one weekend across four hand-building passes.
Prepare the clay and roll a slab
 2Howcompass
Knead 400 grams of air-dry clay for five minutes
Cut approximately 400 grams of air-dry clay from a sealed pack and press-knead it on a clean work surface using the ram's-head method for five full minutes. Air-dry clay arrives packed with uneven moisture and trapped air; kneading equalises both. If you cut the ball in half and see a spiral or hollow core, knead for another two minutes and cut again; a homogeneous cross-section has a smooth, consistent texture throughout. Work on a lightly floured surface (cornstarch, not talc) to prevent sticking, and remember that every observational craft rewards the same patient tactile preparation.[1]
- Keep unused clay wrapped in cling film inside a zip-lock bag at room temperature; an open block begins to harden at the surface within a day.
- Howcompass Arts Desk notes that checking your progress before moving on to Step 2 prevents the most common beginner mistakes.[2]✓
 3Howcompass
Build a two-guide rail of stacked wooden sticks
Set two parallel sticks, each six millimetres tall, one on each side of your rolling area to guide the pin at an even slab thickness. A stack of three uncooked spaghetti bundle sticks works in a pinch; craft-shop popsicle sticks are cleaner and reusable. The guides keep the rolling pin level so the slab reads six millimetres thick across its whole surface rather than thick-centre and thin-edges, the most common beginner slab defect. Keep the rails parallel and roughly 20 centimetres apart, using the same straight-guide discipline you would apply in hand-tool woodworking.[2]
- If your finished bowl has a slight wobble on the base, sand the high point of the base with 120-grit paper in small circular strokes until it sits flat.
- Have your small wooden rolling pin within reach before starting this step so you do not have to pause mid-process.[3]✓
 4Howcompass
Roll from the centre outward in eight passes
Press the pin down at the slab centre and push away, lift and return from the opposite edge, repeating eight passes until the clay touches both rails on all sides. Roll in one direction, then rotate the slab ninety degrees and roll again so the fibre compresses evenly in both axes. If the slab sticks to the pin, dust the pin lightly with cornstarch; if it tears, the clay was under-kneaded and you should re-ball and knead for another three minutes. The layered even-pressure habit mirrors watercolour wash application: one steady direction, then a ninety-degree reset.[3]
- Air-dry clay accepts acrylic paint after sealing: the matte varnish gives a surface for paint to hold without soaking unevenly into the raw clay.
- Never fire air-dry clay in a kitchen oven: the clay is not kiln-formulated, and heating it unevenly can crack the block or release binders from additives in the mix.[4]✓
 5Howcompass
Cut a 16-centimetre circle with a bowl rim or a template
Press a bowl or plate rim approximately 16 centimetres in diameter onto the slab and slice around it with a sharp knife, lifting the excess clay away. A template cut from cardboard with scissors is reusable; trace around the circle before cutting so you do not slip. A slightly larger disc than your target final size is correct: bowls shrink about five to eight percent as air-dry clay loses moisture during the drying pass. The circular template habit is the same one paper crafters use for marbling.[4]
- For a textured rim, press a length of string, a fork, or a dried leaf into the wall before the clay has fully dried.
- Have your inverted ceramic mixing bowl as a mould within reach before starting this step so you do not have to pause mid-process.[5]✓
 6Howcompass
Score the slab edges with a fork before forming
Run the tines of a small fork across the outer two centimetres of the disc rim, creating a light crosshatch texture. The scored edge grips slip better when you later pinch the rim closed; it also signals to the clay fibre where to bend cleanly during the drape step. Keep the score shallow: too deep cuts weaken the wall rather than reinforcing it. The same texture-first, joint-second principle applies to paper hinging for frames.[5]
- Two bowls can be made from 400 grams: half the clay for each, which makes a good practice run so your first real bowl is a second attempt.
- Howcompass Arts Desk notes that checking your progress before moving on to Step 6 prevents the most common beginner mistakes.[6]✓
Drape the slab over a mould
 7Howcompass
Select an inverted bowl mould of your target size
Choose a ceramic or plastic mixing bowl about 15 centimetres in diameter and turn it upside-down on the work surface to act as the form your clay slab drapes over. A slightly tapered bowl gives a natural curve; a straight-sided cylinder will give a flat-walled tureen shape. Line the mould with a sheet of cling film or a thin cloth to prevent the clay sticking while it dries; a lightly floured tea towel works equally well. Any well-lit work surface makes it easier to see the clay tension as you work.[6]
- Keep unused clay wrapped in cling film inside a zip-lock bag at room temperature; an open block begins to harden at the surface within a day.
- Kneading a cold block of clay straight from a delivery can strain your wrist flexors; warm the bag in your lap for five minutes or in a 25-degree room before cutting.[7]✓
 8Howcompass
Drape the disc across the mould centre
Lift the clay disc on your rolling pin or your palms and lower it centred over the inverted bowl, letting gravity pull the edges down each side equally. Adjust the disc before pressing so the rim hangs equally on both sides of the mould; once the clay touches the form, moving it tears the surface. Press your fingertips lightly across the top curve to settle the clay against the mould. The same deliberate centre-alignment cafe sketchers use for landmark placement applies directly to clay.[7]
- If your finished bowl has a slight wobble on the base, sand the high point of the base with 120-grit paper in small circular strokes until it sits flat.
- Howcompass Arts Desk notes that checking your progress before moving on to Step 8 prevents the most common beginner mistakes.[1]✓
 9Howcompass
Smooth the clay from centre outward in eight passes
With fingertips lightly moistened, glide from the mould's top centre outward to the rim in eight short strokes, pressing out any trapped air pockets. Air bubbles trapped under the clay read as lumps once dry and cannot be fixed later. If the clay tears during smoothing, press a small patch of fresh clay over the tear and re-smooth. Work slowly: the more even the pressure, the cleaner the final wall. The same even-pressure control you practised while layering watercolour washes transfers directly to clay.[1]
- Air-dry clay accepts acrylic paint after sealing: the matte varnish gives a surface for paint to hold without soaking unevenly into the raw clay.
- Have your natural sea sponge for rim refinement within reach before starting this step so you do not have to pause mid-process.[2]✓
 10Howcompass
Trim the rim with a knife at the bowl edge
Run a small knife around the mould's base where the clay hangs past the edge, trimming an even wall height. Aim for a consistent three-to-four-centimetre wall depth around the whole bowl; uneven wall height means the bowl will sit at a slight angle once dry. If the rim tears during trimming, press a thin coil of fresh clay around the edge and smooth it to blend, rather than patching after drying. The trim-and-patch rhythm mirrors marbled paper edge-cutting.[2]
- For a textured rim, press a length of string, a fork, or a dried leaf into the wall before the clay has fully dried.
- Air-dry clay is not food-safe and should not hold liquid: use your finished bowl as a decorative piece, a jewellery catch-all or a still-life prop, never for fruit or salad.[3]✓
 11Howcompass
Cover the piece with a towel and rest for twenty-four hours
Loosely lay a cotton tea towel over the drying bowl and leave it on the mould undisturbed for a full day in a room between eighteen and twenty-two degrees. A towel slows the drying just enough to prevent the rim cracking before the body has shrunk evenly; if the air is dry, drape the piece in a loose plastic bag for the first eight hours, then switch to the towel. Do not lift the clay off the mould before twenty-four hours: the walls are still fragile and will collapse. The same slow-dry patience used in hand-bound book projects applies here.[3]
- Two bowls can be made from 400 grams: half the clay for each, which makes a good practice run so your first real bowl is a second attempt.
- Have your water-based matte varnish or pva glaze within reach before starting this step so you do not have to pause mid-process.[4]✓
Refine walls, joints and the rim
 12Howcompass
Lift the dried bowl off the mould after one full day
Gently flex the mould or rock the bowl edge, then slide the dried clay shell off; it should release with a soft suction rather than pulling in pieces. If the clay sticks to the cling-film or tea-towel surface, work around the edge with a thin palette knife to release; a stuck section will chip when forced. Once free, tap the rim lightly with a fingernail: a solid tone means the body is set, a hollow thud means the interior is still soft and needs another four hours. This inspection habit is what every craft workflow in the library recommends.[4]
- Keep unused clay wrapped in cling film inside a zip-lock bag at room temperature; an open block begins to harden at the surface within a day.
- Howcompass Arts Desk notes that checking your progress before moving on to Step 12 prevents the most common beginner mistakes.[5]✓
 13Howcompass
Turn the bowl upright and score the interior base join
Place the bowl face-up, and run a fork across the interior base circle where the slab originally met the mould top, creating a shallow textured seam. Any seam where clay meets clay needs scoring before you thicken it: smooth surfaces do not bond and the joint can crack weeks later. Score a three-centimetre ring around the interior centre. The same texture-before-join principle applies when you score the mount edge for hinging a framed print.[5]
- If your finished bowl has a slight wobble on the base, sand the high point of the base with 120-grit paper in small circular strokes until it sits flat.
- Wet varnish should be applied in a ventilated room, even if the bottle says water-based; prolonged skin or nose contact with acrylic additives can irritate.[6]✓
 14Howcompass
Slip-paste a reinforcing coil along the scored base ring
Mix a teaspoon of crumbled clay with a few drops of water to a thick paste, roll a finger-thick coil, press it into the scored ring, and smooth it into the wall and base with a damp finger. The coil reinforces the structural joint while the slip bonds fresh clay to set clay. Smooth in one direction, base toward wall, so the joint reads as a gentle curve rather than a ledge; a ledge collects dust and is visible through any glaze or seal you apply later. The continuous single-direction stroke is the same control line-drawing practice trains.[6]
- Air-dry clay accepts acrylic paint after sealing: the matte varnish gives a surface for paint to hold without soaking unevenly into the raw clay.
- Howcompass Arts Desk notes that checking your progress before moving on to Step 14 prevents the most common beginner mistakes.[7]✓
 15Howcompass
Refine the exterior rim with a damp sponge
Wet a natural sea sponge and squeeze it almost dry, then glide it along the rim outer edge in slow single-direction passes to remove scalloping from the trimming step. A damp sponge softens the clay surface just enough to erase knife marks without pulling the wall shape; do not press hard enough to thin the rim. Rinse the sponge every third pass so grit does not scratch the surface. The wipe-and-check rhythm is the same one photographers use when wiping glazing for a photo.[7]
- For a textured rim, press a length of string, a fork, or a dried leaf into the wall before the clay has fully dried.
- Have your small jar of water for slip mixing within reach before starting this step so you do not have to pause mid-process.[1]✓
 16Howcompass
Dry the finished bowl for another three days on a flat surface
Sit the refined bowl upright on a sheet of newspaper or a wire rack, turning it ninety degrees every morning, and allow three more days at room temperature for full cure. Air-dry clay loses residual moisture through the walls; leaving it in one orientation dries one side first and can cause a hairline crack as the other side shrinks. A wire rack improves airflow under the base, the usual slow-drying blind spot. Test dryness by pressing your thumbnail into the base underside: it should leave no mark. The rotate-and-rest discipline is the same as cafe sketching session breaks.[1]
- Two bowls can be made from 400 grams: half the clay for each, which makes a good practice run so your first real bowl is a second attempt.
- Never fire air-dry clay in a kitchen oven: the clay is not kiln-formulated, and heating it unevenly can crack the block or release binders from additives in the mix.[2]✓
Sand and seal the finished bowl
 17Howcompass
Sand the exterior with 220-grit in one direction
Once fully dry, run 220-grit sandpaper in single-direction strokes along the exterior wall until the surface feels smooth to a closed eye. Cross-direction strokes create shallow scratches that reappear after sealing; one direction keeps the finish uniform. Pay extra attention to the base rim and any area where the scoring was thick. Blow dust off the bowl and wipe with a dry cloth before sealing. The grit-selection discipline is the same one hand-tool builders follow when finishing timber.[2]
- Keep unused clay wrapped in cling film inside a zip-lock bag at room temperature; an open block begins to harden at the surface within a day.
- Have your small wooden rolling pin within reach before starting this step so you do not have to pause mid-process.[3]✓
 18Howcompass
Apply a first coat of water-based varnish with a flat brush
Use a water-based matte varnish or PVA glaze, a flat one-centimetre brush, and apply the first coat in long strokes from the rim downward, avoiding puddling in the base curve. Dilute slightly with water, roughly one part water to six parts varnish, for the first coat so it penetrates rather than sits on the surface. Two thin coats read deeper and last longer than one thick coat; the thick coat can pool and crack over months. The dilution-first habit is borrowed directly from watercolour wash technique.[3]
- If your finished bowl has a slight wobble on the base, sand the high point of the base with 120-grit paper in small circular strokes until it sits flat.
- Howcompass Arts Desk notes that checking your progress before moving on to Step 18 prevents the most common beginner mistakes.[4]✓
 19Howcompass
Let the first coat cure for two hours before sanding again
Wait at least two full hours at room temperature for the first coat to harden; then run 320-grit sandpaper lightly across the surface and wipe clean before the second coat. A tacky second coat traps dust and bubbles; a cured first coat sanded lightly gives the second coat mechanical grip. Do not skip this inter-coat sanding if you want the finish to feel smooth rather than grainy. The inter-layer patience is the same paper-craft sequencing that keeps bookbinding glue from lifting.[4]
- Air-dry clay accepts acrylic paint after sealing: the matte varnish gives a surface for paint to hold without soaking unevenly into the raw clay.
- Kneading a cold block of clay straight from a delivery can strain your wrist flexors; warm the bag in your lap for five minutes or in a 25-degree room before cutting.[5]✓
 20Howcompass
Apply the second coat and cure overnight
Brush the second coat in the same long downward strokes, then set the bowl upright in a dust-free corner and leave it for eight to twelve hours. A shelf inside a closed cabinet is ideal: airborne fibres settle into wet varnish and show as small specks once dry. Rotate the bowl ninety degrees before the coat has fully set if the base is sticking to the surface below. The dust-free environment is what a photography softbox studio also protects against.[5]
- For a textured rim, press a length of string, a fork, or a dried leaf into the wall before the clay has fully dried.
- Howcompass Arts Desk notes that checking your progress before moving on to Step 20 prevents the most common beginner mistakes.[6]✓
 21Howcompass
Display the bowl on a flat shelf and photograph it in natural light
Set the sealed bowl on a shelf in natural daylight, not on a windowsill where rain or a radiator can damage it, and take a photo with a phone at the bowl's mid-height to record the finished piece. Side lighting from a window three-quarters around the bowl reveals the wall curve and rim; a direct overhead flash flattens the piece and makes a decorative bowl look like a flat disc. Photographs of finished crafts are the same records useful when you start to frame and mount artwork or build a personal portfolio of your work.[6]
- Two bowls can be made from 400 grams: half the clay for each, which makes a good practice run so your first real bowl is a second attempt.
- Have your sharp paring knife for trimming within reach before starting this step so you do not have to pause mid-process.[7]✓
Community & Expert Q&A
Question: How thick should a beginner slab be for a small bowl?
Six millimetres is the sweet spot: thin enough to drape over a mould without cracking at the base curve, thick enough to survive trimming and drying without collapsing. Anything over eight millimetres stretches the clay under its own weight as it dries.
Question: Can I use air-dry clay outdoors?
No; air-dry clay stays porous and reabsorbs moisture in rain or frost. Sealing helps indoors but cannot survive freeze-thaw or long-term outdoor humidity. Keep the piece indoors on a shelf.
Question: Do I need a kiln to make a usable bowl?
A kiln-fired stoneware bowl is what holds liquids; without a kiln you cannot produce that. Air-dry clay makes a decorative vessel. If you eventually want functional ceramics, a local studio pays per firing and the same hand-building technique you learn here transfers directly.
Question: My bowl cracked at the rim while drying. Can I fix it?
Small hairline cracks can be filled by pressing a thin slip (crumbled clay mixed with water to paste) into the crack, smoothing the surface and letting it dry flat again. Wider breaks mean the drying was too fast; wrap the piece in cling film loosely and let it cure slower next time.
Question: What is the difference between air-dry and polymer clay for a beginner?
Air-dry clay cures in open air and accepts paint or seal directly; polymer clay must be baked in a home oven and cannot be reworked once set. Air-dry is more forgiving for hand-building a bowl because a mistake can be re-wet and pressed again.
Tips
- Keep unused clay wrapped in cling film inside a zip-lock bag at room temperature; an open block begins to harden at the surface within a day.
- If your finished bowl has a slight wobble on the base, sand the high point of the base with 120-grit paper in small circular strokes until it sits flat.
- Air-dry clay accepts acrylic paint after sealing: the matte varnish gives a surface for paint to hold without soaking unevenly into the raw clay.
- For a textured rim, press a length of string, a fork, or a dried leaf into the wall before the clay has fully dried.
- Two bowls can be made from 400 grams: half the clay for each, which makes a good practice run so your first real bowl is a second attempt.
Warnings
- Air-dry clay is not food-safe and should not hold liquid: use your finished bowl as a decorative piece, a jewellery catch-all or a still-life prop, never for fruit or salad.
- Kneading a cold block of clay straight from a delivery can strain your wrist flexors; warm the bag in your lap for five minutes or in a 25-degree room before cutting.
- Never fire air-dry clay in a kitchen oven: the clay is not kiln-formulated, and heating it unevenly can crack the block or release binders from additives in the mix.
- Wet varnish should be applied in a ventilated room, even if the bottle says water-based; prolonged skin or nose contact with acrylic additives can irritate.
Things You'll Need
- 400 grams air-dry clay (white or terracotta tone)
- Small wooden rolling pin
- Wooden guide sticks for slab thickness
- Inverted ceramic mixing bowl as a mould
- Cling film or cotton tea towel for the mould liner
- Sharp paring knife for trimming
- Small dinner fork for scoring
- Natural sea sponge for rim refinement
- 220-grit and 320-grit sandpaper
- Water-based matte varnish or PVA glaze
- Flat one-centimetre brush
- Wire rack or dust sheet for drying
- Cornstarch for kneading dust
- Small jar of water for slip mixing
Related Howcompass Guides
References (7)
- Pottery - WikipediaWikimedia Foundation
- Clay - WikipediaWikimedia Foundation
- Kiln - WikipediaWikimedia Foundation
- Glaze - WikipediaWikimedia Foundation
- Terracotta - WikipediaWikimedia Foundation
- Pottery - BritannicaEncyclopaedia Britannica
- Tate - Learning ResourcesTate Gallery
Howcompass editors verify each step. Sources are listed so you can read the underlying guidance yourself.
Did this article help you?
0 readers found this helpful — add your vote.
No comments yet — be the first to share your results.