How to Sketch Strangers in a Cafe with a Gesture-First Method
A guide to Prepare your kit and pick a strategic seat, Capture the thirty-second gesture, Build proportions with landmark checks, Add weight and quiet detail
Life sketching in public is the fastest way to train observational proportion: the subject moves, your deadline is thirty seconds before they shift posture, and a felt-pen line either lands where you meant or it does not. This guide breaks the process into layers: kit and seat preparation, short gesture capture, proportion landmarks, and a quiet detailing pass. No erasing, no drawing from imagination, no fidgeting. By the end you will be able to build a convincing sketch of a seated stranger in three minutes while the person beside you drinks coffee, completely unaware. Whether you are starting with Prepare your kit and pick a strategic seat or moving on to Capture the thirty-second gesture, Build proportions with landmark checks, or Add weight and quiet detail, following each step in order makes the difference between guesswork and reliable results, with practical guidance from Howcompass Arts Desk.
How do you sketch Strangers in a Cafe with a Gesture-First Method?
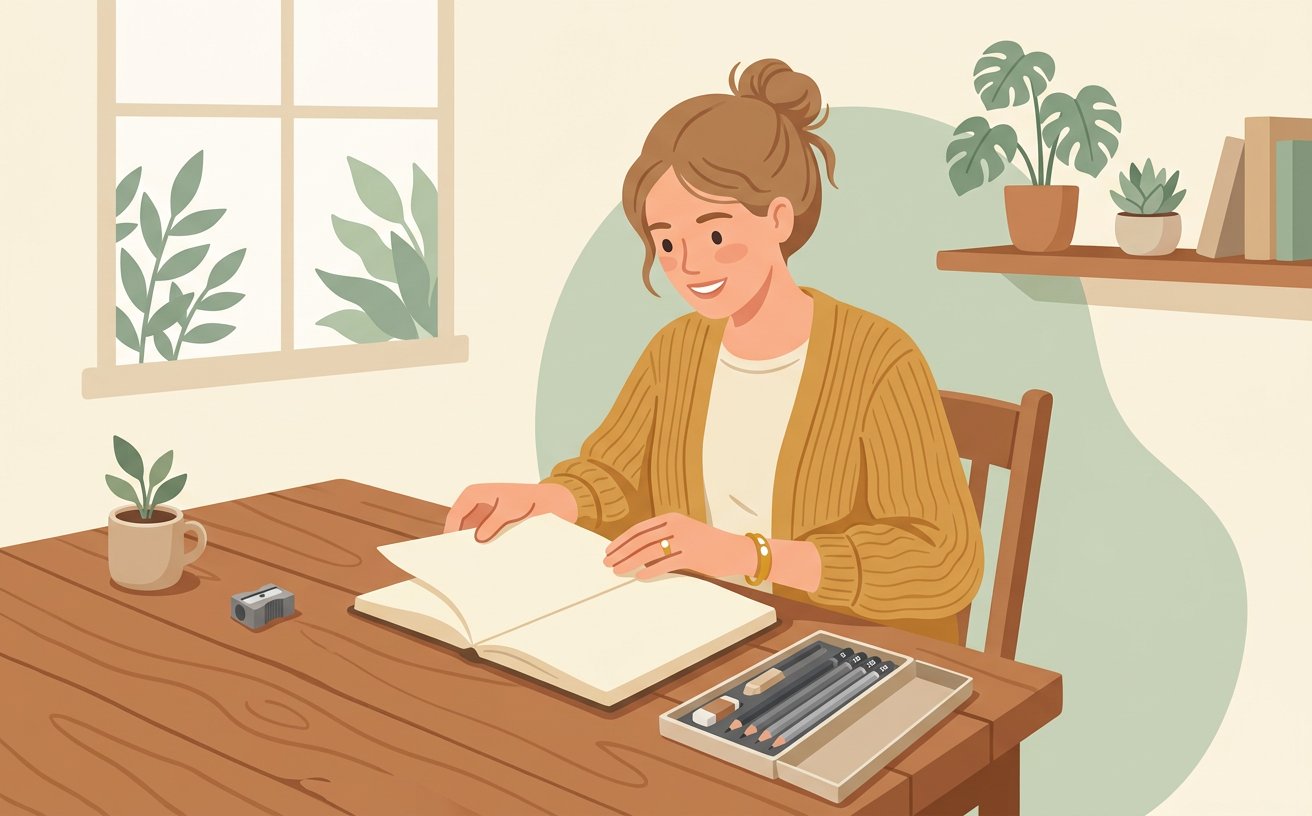 Howcompass | How to Sketch Strangers in a Cafe with a Gesture-First Method
According to Howcompass Arts Desk, there are 4 key stages to master: Prepare your kit and pick a strategic seat, Capture the thirty-second gesture, Build proportions with landmark checks, Add weight and quiet detail. Capture the energy and proportion of seated strangers over thirty-second gesture passes, layered landmark checks and quiet detail work in a warm cafe corner using a pen, a pocket sketchbook and a gesture-first method.
Prepare your kit and pick a strategic seat
 2Howcompass
Choose a pocket sketchbook with 100-120 gsm paper
Pick a hard-cover pocket book roughly 90 by 140 mm with paper thick enough to hold a fountain-pen line without feathering: 100 gsm is the minimum, 120 gsm is comfortable. Any thinner and your pen nib catches on the sheet fibres; any thicker and the page curls against your hand when held at an angle. Open the book to a fresh spread before you sit; the first page is always the most nervous because your hand has not warmed. Carry a 0.5 mm fineliner (fine point) and a 2 B pencil; use pencil for the first pass, pen only when committed. For a wider palette you can layer watercolour washes later at home.[1]
- Start at a quiet hour: two to four in the afternoon when cafes are half-full gives you time between sittings to review your pages.
- Howcompass Arts Desk notes that checking your progress before moving on to Step 2 prevents the most common beginner mistakes.[2]✓
 3Howcompass
Select a seat with a thirty-degree side angle and natural light
Sit where you can view your subject at roughly thirty degrees from the side rather than head-on or from directly behind. A three-quarter view reveals depth: you can see the far shoulder, the side of the nose, the angle of one arm while the other is partially hidden, all of which translate into more convincing proportions. Natural window light falling across the subject's front separates shadow from highlight, making the volume readable. Face the window yourself so the light falls onto your page; the same lighting logic a portrait studio setup applies artificially.[2]
- Use a pen with an archival ink that will not smear when stacked in a bag; waterproof fineliners protect your gesture work during transit.
- Have your 0.5 mm black fineliner (waterproof archival ink) within reach before starting this step so you do not have to pause mid-process.[3]✓
 4Howcompass
Set a timer app for thirty-second intervals
Open a repeat-timer app and set thirty-second intervals with a short buzzer, then start it before you draw. The timer externalises your discipline: when it sounds you must lift your pen and leave the line, no matter how unfinished the gesture. This is the single most important habit in life sketching, because it prevents the tendency to overwork a shape. If your app does not auto-repeat, start manually for the first five rounds and you will find your rhythm naturally slows to roughly the same interval. The Berklee gesture-drawing method and many art programmes use this same constraint, and the Arts and Entertainment library treats timer drills as the baseline for every observational skill.[3]
- Draw in ten-second bursts when a subject keeps shifting; you capture the most energetic lines when the clock is almost over.
- Cafe tables are often wet from condensation; rest your sketchbook on a napkin or coaster to protect the page from moisture that can buckle the paper and ruin your next drawing.[4]✓
 5Howcompass
Position the book at the same eye level as the subject
Rest the sketchbook flat on the table or on your knee so the page sits roughly level with your eyes when you look at the person. If the book lies flat, tilt your head so you can see both the page and the subject in one downward glance rather than scanning between them. This alignment lets your eyes flicker back and forth within a small vertical sweep instead of lifting and lowering your gaze repeatedly, and keeps the subject still in the corner of your vision. The same spatial alignment beginners in drawing use for still-life prevents the neck from tensing.[4]
- Vary subjects: seated, standing, walking, leaning, each posture teaches a different proportion relationship.
- Have your small kneaded eraser for lifting tone within reach before starting this step so you do not have to pause mid-process.[5]✓
Capture the thirty-second gesture
 6Howcompass
Squint to see the figure as one dark mass
Narrow your eyes until the subject's edges blur into a single shape and start drawing that silhouette outline before any internal detail. Squinting removes the distraction of clothing patterns, facial features, and hair texture, leaving you with a readable mass: the combined volume of head, torso, knees, and any chair or table touching the figure. Your first line in each sketch should enclose this mass, not start at the head and work downward. In life drawing classes the same squint-and-block method is taught as step one of every short pose, and it is a habit worth importing into any observational craft you practise.[5]
- Never confront a subject who notices you drawing; a quick smile, a nod, and a page turn is enough. Sketching quietly is a courtesy, not a surveillance act.
- Howcompass Arts Desk notes that checking your progress before moving on to Step 6 prevents the most common beginner mistakes.[6]✓
 7Howcompass
Draw a single curved line for the spine
Before outlining the mass, place one confident curved line from the base of the skull to the tailbone area indicating the figure's spinal curve. The spine dictates the entire posture: forward lean means a C-curve, upright means a gentle S. Commit to one line without stopping, lifting the pencil at the end and restarting from the next landmark; if the line lands slightly wrong, do not erase, adjust the rest around it. This single stroke does more for gesture believability than any other line you will draw in thirty seconds. The same visual-layering discipline used by sketchbook practitioners begins with one structural stroke.[6]
- Start at a quiet hour: two to four in the afternoon when cafes are half-full gives you time between sittings to review your pages.
- Using a hard-pointed pencil at a steep angle on thin newsprint-style paper can tear the sheet rather than mark it; switch to a softer pencil or thicker stock.[7]✓
 8Howcompass
Block the ribcage and pelvis as two tilted shapes
Add a rough egg-shape for the ribcage and a smaller wedge for the pelvis at opposite angles, connected by the spine line. The ribcage tilts forward when a person hunches; the pelvis counter-tilts when they shift weight to one hip. The angle between those two boxes is the postural gesture: a relaxed seated person has a wide gap between them, a slumped person collapses it. Draw both shapes without looking at the book; trust the eye-to-hand connection you just warmed up. If your shapes are too small, your line will run out of room in the next step; if too large, you will crowd the page, and the beginner drawing habit of overthinking scale takes another session to unlearn.[7]
- Use a pen with an archival ink that will not smear when stacked in a bag; waterproof fineliners protect your gesture work during transit.
- Howcompass Arts Desk notes that checking your progress before moving on to Step 8 prevents the most common beginner mistakes.[1]✓
 9Howcompass
Add head, shoulder line and one limb to anchor the gesture
Drop a small circle for the head at the top of the spine, a horizontal line from shoulder to shoulder, and one forearm or thigh indicating weight-bearing direction. The shoulder line reveals whether the figure is leaning; the limb shows where their weight rests. These four marks complete the basic gesture pass: a viewer can read the pose without any other detail. Aim for a total of five marks in thirty seconds; do not chase the hands or facial features. Croquis tradition values this same economy: the minimum lines that describe the most information, a principle every Arts and Entertainment sketching drill returns to.[1]
- Draw in ten-second bursts when a subject keeps shifting; you capture the most energetic lines when the clock is almost over.
- Have your small bag for finished page stacks within reach before starting this step so you do not have to pause mid-process.[2]✓
 10Howcompass
Restart the timer and draw three more gesture passes on the same page
When the buzzer sounds, immediately lift your pen, glance at the subject, and start the next gesture on the same spread. Do not look at your previous drawings; look only at the subject. Working four passes in two minutes overloads your eye-hand loop productively: by the fourth repetition you will already anticipate where the shape needs to be before your hand places it, which is exactly what drawing from observation trains toward. Use a new page when the previous one is crowded. Four passes per page means eight to ten passes per cafe sitting.[2]
- Vary subjects: seated, standing, walking, leaning, each posture teaches a different proportion relationship.
- Drawing identifiable strangers in public can make some people uncomfortable; if someone notices and appears uneasy, stop, close the book, and move or leave. Respect body language before any artistic intent.[3]✓
Build proportions with landmark checks
 11Howcompass
Measure head height against the seated figure with your pen
Hold your pencil at arm's length, align the tip with the top of the subject's head and mark the chin with your thumb, then lower the pencil to see how many head-lengths fit between the chin and the chair seat. For most seated adults the torso plus thighs measure two to three head-lengths; the leg-to-torso ratio differs at every angle, so measure fresh each time. This arm's-length sight-measuring technique is the foundational skill behind all figure drawing classes and the same method the sketchbook-diary approach borrows for perspective.[3]
- Never confront a subject who notices you drawing; a quick smile, a nod, and a page turn is enough. Sketching quietly is a courtesy, not a surveillance act.
- Have your pocket sketchbook, hard cover, 90-140 mm, 120 gsm paper within reach before starting this step so you do not have to pause mid-process.[4]✓
 12Howcompass
Mark the elbow line before drawing any arm
Look at the subject, identify where their elbow sits relative to the navel or the hip, then put a small dash on your page at that height before drawing the arm shape. Beginners draw arms too high or too short because they guess; a single horizontal landmark line anchors the shape. If your subject's elbow rests on a table, mark the table surface as the elbow line and draw from there; if their arm hangs beside them, use the hip. Do not start drawing the actual arm outline until at least two landmarks exist on your page, and always check the proportion landmarks before committing to line weight.[4]
- Start at a quiet hour: two to four in the afternoon when cafes are half-full gives you time between sittings to review your pages.
- Howcompass Arts Desk notes that checking your progress before moving on to Step 12 prevents the most common beginner mistakes.[5]✓
 13Howcompass
Establish the knee-to-hip horizontal relationship
Check whether the subject's knees sit higher or lower than their hips, and draw one horizontal line through both points before adding legs. Seated posture changes this relationship constantly: a person sitting cross-legged puts knees far above hips, a person with legs extended puts knees at or below. Getting the hip-knee line correct makes legs look anchored rather than painted on. If you skip the line and start drawing the thigh outline, the proportion error arrives mid-page and the sketch collapses; the visual-diary habit of checking one horizontal relationship at a time prevents this entirely.[5]
- Use a pen with an archival ink that will not smear when stacked in a bag; waterproof fineliners protect your gesture work during transit.
- Repeatedly extending your arm at shoulder height to sight-measure can fatigue the deltoid over an hour; alternate sight-measuring with your elbow resting on the table.[6]✓
 14Howcompass
Compare negative shapes between limbs and body
Glance at the empty triangular gaps the limbs create against the torso or chair, then match those negative shapes rather than drawing the limb directly. When a person rests their forearm across their belly, the gap between the arm and the body is a rough triangle; check whether your page's gap matches the real one. This negative-space method is one of the core tricks in perspective drawing) and prevents the common error where limbs attach at the wrong angle because you drew the limb first. The observational sketching library treats this as the fastest route from gesture to accurate form.[6]
- Draw in ten-second bursts when a subject keeps shifting; you capture the most energetic lines when the clock is almost over.
- Howcompass Arts Desk notes that checking your progress before moving on to Step 14 prevents the most common beginner mistakes.[7]✓
 15Howcompass
Refine the silhouette by tracing only the outer edge
Take one slow pass around the entire outline of the figure without entering the interior, checking that every internal mark still fits inside the boundary. This single refinement line corrects proportion errors that accumulated during the fast gesture passes. Keep the outer line slightly thicker than internal construction marks so the figure pops off the page; a soft 2 B pencil makes this easy to vary. Do not erase construction marks at this stage; the faint internal lines will help you place clothing detail, exactly the sequencing the drawing fundamentals guide teaches for every observational subject.[7]
- Vary subjects: seated, standing, walking, leaning, each posture teaches a different proportion relationship.
- Have your repeat-timer phone app set to thirty seconds within reach before starting this step so you do not have to pause mid-process.[1]✓
Add weight and quiet detail
 16Howcompass
Press firmer on the shadow-side outlines
Identify which side of the subject is in shadow, then double your pencil pressure along every outline segment on that side. A figure drawn with uniform line weight looks like a diagram; heavier shadow-side lines turn the same shapes into a three-dimensional form sitting in space. This is a one-line change that upgrades the sketch immediately and works in any cafe lighting. If the window is to the subject's right, their right outline is brighter; darken the left contour instead. The portrait lighting logic works the same way: one dominant light source, one shadow side, everything else falls into place.[1]
- Never confront a subject who notices you drawing; a quick smile, a nod, and a page turn is enough. Sketching quietly is a courtesy, not a surveillance act.
- Cafe tables are often wet from condensation; rest your sketchbook on a napkin or coaster to protect the page from moisture that can buckle the paper and ruin your next drawing.[2]✓
 17Howcompass
Scribble one dark tone where fabric folds
Look at the subject's lap and elbows: wherever fabric gathers in a crease, scribble a small triangular shadow patch with the side of your pencil lead. Three or four fold marks per limb are enough; too many turns the sketch into noise. The shadow patches read as cloth without requiring you to draw each individual fold line. This is the same economy gesture practice used by professional fashion illustrators who render garments in seconds, and it is the detail layer the sketchbook diary practitioner adds last rather than first.[2]
- Start at a quiet hour: two to four in the afternoon when cafes are half-full gives you time between sittings to review your pages.
- Have your napkin or coaster under the book within reach before starting this step so you do not have to pause mid-process.[3]✓
 18Howcompass
Add the chair or table contour as a grounding line
Draw the nearest two edges of the chair seat or table the subject is touching so the figure appears to rest in space rather than floating. Two straight lines are enough: the seat edge running horizontally under the thigh, and one vertical leg or table leg anchoring the composition. Without a grounding line, a seated figure looks like they are hovering three centimetres above the paper. The same spatial anchoring applies when you eventually frame your sketches for wall display.[3]
- Use a pen with an archival ink that will not smear when stacked in a bag; waterproof fineliners protect your gesture work during transit.
- Howcompass Arts Desk notes that checking your progress before moving on to Step 18 prevents the most common beginner mistakes.[4]✓
 19Howcompass
Lift the pencil and sign the date in the corner
Write the date and a short note like a time or a place in one corner after finishing, not during the sketch. The signing habit converts a stack of loose pages into a dated sketchbook diary and lets you review progress in six months. Keep the date small so it does not compete with the drawing. Then flip the page; do not look back at the previous sketch until the cafe sitting ends.[4]
- Draw in ten-second bursts when a subject keeps shifting; you capture the most energetic lines when the clock is almost over.
- Using a hard-pointed pencil at a steep angle on thin newsprint-style paper can tear the sheet rather than mark it; switch to a softer pencil or thicker stock.[5]✓
 20Howcompass
Pack the book and rest your hand for five minutes
Close the sketchbook, stretch both hands, and drink your coffee before starting another session. Five consecutive gesture sketches is enough for one sitting early in the practice; after twenty minutes of continuous drawing the wrist flexors fatigue and lines lose the confident single-stroke quality that makes a sketch read. Rest, then decide whether to start a fresh spread or call it done. A clay-working session uses the same rhythm of short focused bursts followed by rest.[5]
- Vary subjects: seated, standing, walking, leaning, each posture teaches a different proportion relationship.
- Howcompass Arts Desk notes that checking your progress before moving on to Step 20 prevents the most common beginner mistakes.[6]✓
Community & Expert Q&A
Question: Is it rude to sketch strangers in public?
Sketching quietly with a small book is generally accepted in European cafes; what feels intrusive is sustained staring. Glance quickly at the subject, draw from memory for a few seconds, glance again. If someone notices and looks uncomfortable, close the book, move, or leave; respect the person before the page.
Question: Do I need drawing experience to start sketching people?
No prior experience is required. The gesture-first method is specifically designed for beginners; the thirty-second timer prevents you from overthinking proportions and forces line confidence before technical skill. Most people see improvement in their cafe sketches by the fifth session.
Question: What pen works best on cheap sketchbook paper?
A 0.5 mm waterproof fineliner such as a Sakura Pigma Micron or Staedtler Pigment Liner delivers a clean line on 100 gsm paper without feathering; ballpoint pens skip on smooth pages and rollerballs bleed on textured stock. Test the pen on a corner page before your first drawing.
Question: How do I know when a gesture drawing is finished?
When the timer ends, the line lifts and the next gesture starts. In a gesture pass, unfinished is correct; the whole point is a rapid read of posture and weight, not a polished illustration. Aim for five to ten marks; anything more has drifted into proportion territory.
Question: Should I sell my cafe sketches?
In most European countries a public sketch of a person is your work and your copyright belongs to you, but publishing a recognisable identifiable subject in a commercial context can conflict with personality rights. Keep the sketch personal, or frame it in your home gallery wall via our [framing guide](/how-to/Frame-and-Mount-Artwork-for-Wall-Display) without commercial reproduction.
Tips
- Start at a quiet hour: two to four in the afternoon when cafes are half-full gives you time between sittings to review your pages.
- Use a pen with an archival ink that will not smear when stacked in a bag; waterproof fineliners protect your gesture work during transit.
- Draw in ten-second bursts when a subject keeps shifting; you capture the most energetic lines when the clock is almost over.
- Vary subjects: seated, standing, walking, leaning, each posture teaches a different proportion relationship.
- Never confront a subject who notices you drawing; a quick smile, a nod, and a page turn is enough. Sketching quietly is a courtesy, not a surveillance act.
Warnings
- Drawing identifiable strangers in public can make some people uncomfortable; if someone notices and appears uneasy, stop, close the book, and move or leave. Respect body language before any artistic intent.
- Using a hard-pointed pencil at a steep angle on thin newsprint-style paper can tear the sheet rather than mark it; switch to a softer pencil or thicker stock.
- Cafe tables are often wet from condensation; rest your sketchbook on a napkin or coaster to protect the page from moisture that can buckle the paper and ruin your next drawing.
- Repeatedly extending your arm at shoulder height to sight-measure can fatigue the deltoid over an hour; alternate sight-measuring with your elbow resting on the table.
Things You'll Need
- Pocket sketchbook, hard cover, 90-140 mm, 120 gsm paper
- 0.5 mm black fineliner (waterproof archival ink)
- 2 B graphite pencil
- Small kneaded eraser for lifting tone
- Repeat-timer phone app set to thirty seconds
- Foldable reading light if cafe is dim
- Napkin or coaster under the book
- Small bag for finished page stacks
- Fine archival pen for signing and dating
Related Howcompass Guides
References (7)
- Figure drawing - WikipediaWikimedia Foundation
- Croquis - WikipediaWikimedia Foundation
- Perspective (graphical) - WikipediaWikimedia Foundation
- Fashion illustration - WikipediaWikimedia Foundation
- Drawing - WikipediaWikimedia Foundation
- Berklee College of MusicBerklee College of Music
- Tate - Learning ResourcesTate Gallery
Howcompass editors verify each step. Sources are listed so you can read the underlying guidance yourself.
Did this article help you?
0 readers found this helpful — add your vote.
No comments yet — be the first to share your results.