How to Hand-Sew a Sturdy Canvas Tote Bag With a Backstitch
A guide to Choose, shrink and square the fabric, Sew the side and base seams by hand, Finish the hem, handles and lining, Test, wash and repair the bag
A tote bag is the friendliest heavy-duty project in hand sewing: four panels, two handles, and no curves to fight. It is also the item that fails most publicly, because a shoulder seam sewn with a slack running stitch bursts the first time it carries a laptop and a stack of paper. The fix is not a cleverer pattern, it is discipline - fabric that has been shrunk and squared before the scissors move, a backstitch whose stitches overlap so the row behaves like machine stitching, and handles anchored inside the hem with a box-and-X rather than two straight lines. Do those three things and a bag sewn entirely with a needle and thread will outlast one bought off a rack. Whether you are starting with Choose, shrink and square the fabric or moving on to Sew the side and base seams by hand, Finish the hem, handles and lining, or Test, wash and repair the bag, following each step in order makes the difference between guesswork and reliable results, with practical guidance from Howcompass Hobbies and Crafts Desk.
How do you hand-Sew a Sturdy Canvas Tote Bag With a Backstitch?
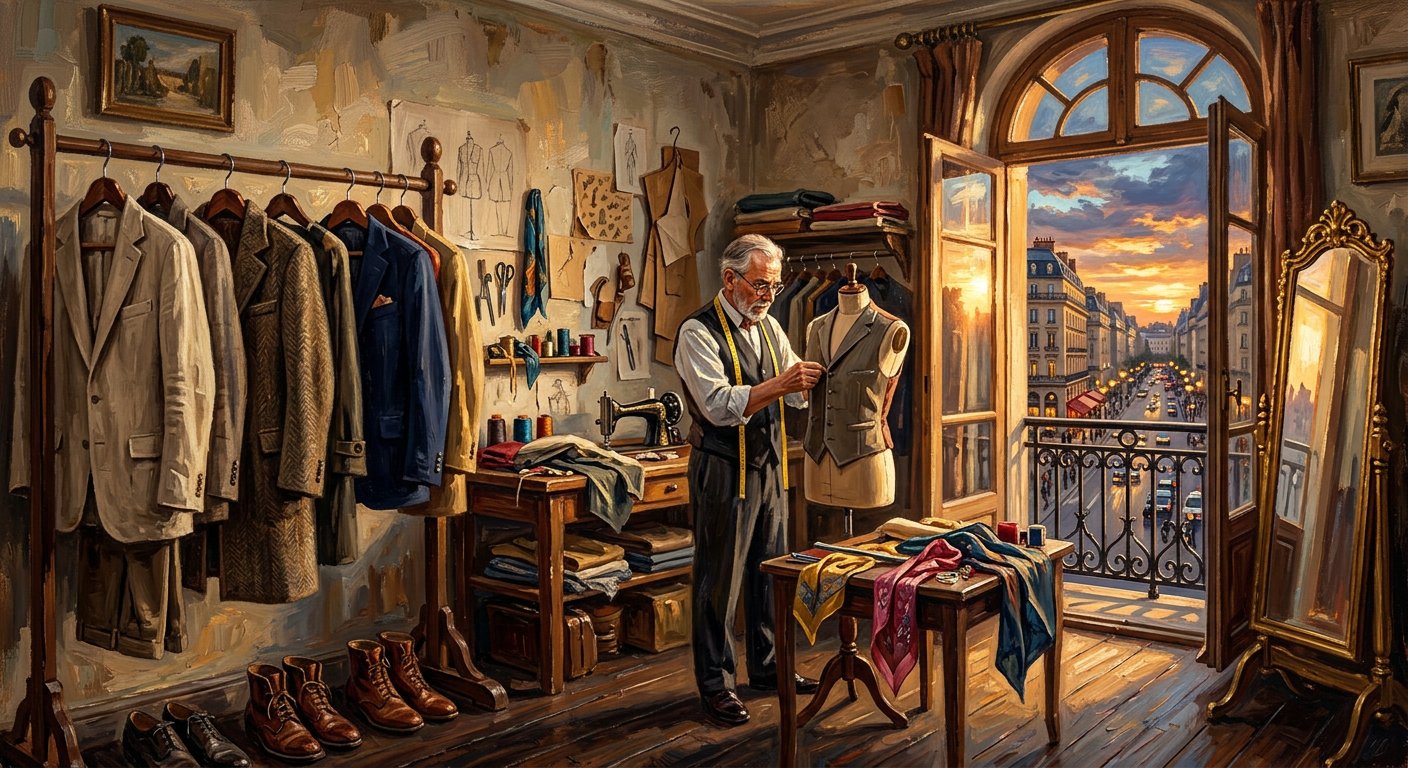 Howcompass | How to Hand-Sew a Sturdy Canvas Tote Bag With a Backstitch
According to Howcompass Hobbies and Crafts Desk, there are 4 key stages to master: Choose, shrink and square the fabric, Sew the side and base seams by hand, Finish the hem, handles and lining, Test, wash and repair the bag. Cut cotton duck on the true grain, sew load-bearing seams with a hand-worked backstitch, box the base, and attach webbing handles that will not rip out when the bag is full of books.
Choose, shrink and square the fabric
 2Howcompass
Buy medium cotton duck, not decorator canvas
Choose a 12 oz (roughly 400 gsm) cotton duck or a tight-woven canvas and hold a corner up to a window before you pay. You want to see the individual ribs of the weave without seeing daylight straight through it: decorator and upholstery canvases are stiffened with a synthetic size that cracks along fold lines within a year, and the thin 'shopping bag' cottons stretch at the seam allowance under load. Twelve-ounce duck takes a 3 mm backstitch through two layers with a between #9 needle, carries 4-5 kg without the fabric distorting around the stitches, and softens with washing while keeping its shape. A 50 x 140 cm piece is enough for one bag plus a lining. If your cutting bench is still being built, the tool and clamping notes in Start Woodworking and Paper Crafts at Home apply just as well to a fabric work surface.[1]
- Sew with the bag on your lap and the fabric folded over your off hand; unsupported canvas flexes and the stitch length wanders.
- Howcompass Hobbies and Crafts Desk notes that checking your progress before moving on to Step 2 prevents the most common beginner mistakes.[2]✓
 3Howcompass
Shrink the fabric before you cut a single piece
Wash the canvas once on a hot 60 °C cycle and tumble it on medium heat before you measure anything. Cotton duck relaxes and shortens noticeably on its first hot wash, so a panel cut straight off the bolt ends up out of square and your 1.5 cm seam allowance quietly becomes 1.3 cm. Take it out of the dryer almost dry, press it hard with a hot iron and steam, and let it cool flat. Skip fabric softener entirely: it leaves a film on the fibres that makes hand stitches drag and makes topstitching look uneven. Treating cloth as something that moves is the same lesson a knitter learns the hard way, which Hand-Wash Merino Wool and Cashmere Sweaters Without Shrinking covers from the damage side.[2]
- A thimble on the middle finger of the pushing hand lets you drive a between through two layers of duck without straining the tendon.
- Have your 0.75 m of cotton poplin for the lining within reach before starting this step so you do not have to pause mid-process.[3]✓
 4Howcompass
Find a true grain and check it with diagonals
Snip the selvedge and tear the canvas across, then verify the corner is square by measuring both diagonals. Cotton duck with a plain weave tears along a straight weft line, which gives you a genuine grain edge far faster than cutting by eye; if the fabric resists tearing, snip further every few centimetres until the tear runs. Lay the panel flat, put a 30 cm metal ruler against the selvedge and check that the torn edge meets it at 90°, then measure corner to corner both ways: the two diagonal readings must match within about 2 mm. A panel that is even slightly off-square will make the bag hang crooked forever, and no amount of careful stitching fixes it. Squaring by diagonals rather than trusting a straight edge is the same check a carpenter uses when assembling a case, which Build a Wooden Birdhouse With Simple Hand Tools walks through for timber.[3]
- Change thread every 25-30 cm of sewing. Cotton thread that has been worked through fabric is frayed and it fails at the eye.
- Pushing a needle through doubled canvas with pliers or against your palm is how needles snap and embed in the hand; use a thimble and stop if the fabric will not yield.[4]✓
 5Howcompass
Cut the body panels with allowance added
Cut two body panels at 48 x 41 cm, which is a 45 x 38 cm finished bag plus 1.5 cm all round. Add allowance to the finished size before cutting rather than trimming afterwards, and cut each length in one continuous pass: a rotary blade on a self-healing mat leaves the truest edge, but a sharp 20 cm dressmaker shear works if you keep the blades sliding along the mat and never lift the fabric. Cut one lining pair from lighter cotton poplin at the same size, and one 32 x 17 cm base strip if you want a stiff bottom. Mark the wrong side of every piece with a short arrow showing which way is up so the handles end up symmetrical; a crooked handle is the most visible mistake on a handmade bag, and it is worth photographing the laid-out pieces as you would for the step shots in Take Better Photos so you can put them back in the same order.[4]
- Press every seam as you go, not at the end. A hand seam that has been pressed looks twice as neat as an unpressed one.
- Have your between #9 and #10 hand-sewing needles within reach before starting this step so you do not have to pause mid-process.[5]✓
 6Howcompass
Mark the seam line, not the cutting line
Draw a 1.5 cm seam line on the wrong side of every panel with a marking wheel and soapstone, tailor's chalk or a sliver of dry soap. Sewing to a marked line is what lets you hold an even stitch length without thinking about it, and an even line is what makes hand sewing look deliberate rather than homemade. Test your marker on an offcut and give it a hot wash before trusting it: ballpoint and 'permanent' craft pens bleed through canvas and show on the right side after a year. Keep the line continuous around corners, because you will pivot the stitching there. Write the finished measurements in a notebook so a second bag matches the first, in the same spirit as keeping the running notes described in Keep a Daily Visual Sketchbook Diary While Traveling.[5]
- Cut test strips from the same wash as the bag and sew them first, then wash the strip: if the thread has faded, change brands.
- Howcompass Hobbies and Crafts Desk notes that checking your progress before moving on to Step 6 prevents the most common beginner mistakes.[6]✓
Sew the side and base seams by hand
 7Howcompass
Thread a between needle and wax the thread
Cut 60 cm of strong button or waxed linen thread, wax it, and use a between #9 or #10 needle. A length longer than about 70 cm twists and snags after ten minutes; doubled thread gives you two strands through the eye and twice the bulk in the needle hole, so for canvas most makers work a single strong strand and sew two rows instead. Beeswax dragged twice along the thread lays the fibres down, stops tangling and helps the stitch pull snug into the weave. A between is short and thick-walled because it is meant to be pushed through cloth with a thimble on the middle finger rather than pulled - the thimble is not optional, and a flat-topped one on the pushing hand's middle finger is the pattern most sewers settle on. Short, waxed, single-strand thread is also the answer when a repair keeps tangling mid-stitch, as anyone reworking a coat fastener discovers while they sew a loose coat button back on with a thread shank.[6]
- Sew with the bag on your lap and the fabric folded over your off hand; unsupported canvas flexes and the stitch length wanders.
- Needle-prick wounds over a shared pincushion can become infected quickly; wash the puncture with soap and running water and watch it for redness and swelling.[1]✓
 8Howcompass
Start with backstitches, not a knot
Begin 1.5 cm in from the raw edge with three short backstitches that overlap each other, and leave a 5 cm tail lying inside the seam allowance. A knot at the start of a hand seam leaves a hard lump that shows through the right side after pressing and makes the seam impossible to flatten. Overlapping backstitches lock the thread the way a machine's bar tack does: take 3 mm, come up 3 mm ahead, go back into the first hole, and repeat so the thread doubles back on itself every stitch. When you reach the end, run the needle through the last three stitches under the fabric rather than knotting, then trim. Keeping the start flat matters because a lumpy seam line will telegraph through the right side once the bag is pressed, and it is the same reason a repair is worked from the underside in mend a Torn Woven Jacket Seam With an Invisible Ladder Stitch.[1]
- A thimble on the middle finger of the pushing hand lets you drive a between through two layers of duck without straining the tendon.
- Howcompass Hobbies and Crafts Desk notes that checking your progress before moving on to Step 8 prevents the most common beginner mistakes.[2]✓
 9Howcompass
Work a true backstitch down the side seam
Sew with the two faces together, stitching on the marked line at roughly 3 mm per stitch, six or seven stitches to the centimetre. The rule that makes a backstitch strong is that the needle always goes back into the tail end of the previous stitch and comes up one stitch length ahead, so the thread behind the needle is continuous with no gaps - if you can see pale fabric between loops, you are actually working a running stitch and the seam will open under load. Keep the fabric folded over your non-sewing hand so the two layers cannot shift, and stop to check the seam allowance from the back every 10 cm; a stray millimetre at the start compounds into a twisted panel by the end. Photograph the first 10 cm in side light before continuing; raking light exposes a gap or a sliding allowance far better than your eye does after ten minutes of near work, as Take Better Photos explains about texture.[2]
- Change thread every 25-30 cm of sewing. Cotton thread that has been worked through fabric is frayed and it fails at the eye.
- Have your marking wheel or tailor's chalk within reach before starting this step so you do not have to pause mid-process.[3]✓
 10Howcompass
Use a French seam so no raw edge can fray
For a canvas that will be washed often, sew the side seams twice: first with the faces apart at 6 mm, then pressed and folded at 6 mm again. Turn the bag so the wrong sides face each other, sew a 6 mm line, press both allowances to one side and trim one of them roughly in half, then fold along the seam so the raw edges are tucked inside and sew a second 6 mm line. You end up with an enclosed seam that cannot fray from the inside and a double row of stitching that is far stronger than a single line - exactly what a bag carrying books needs. It costs an extra hour and it is the single upgrade that most distinguishes a handmade tote that survives five years from one that splits at the corner. It costs an hour and it removes the argument entirely: enclose the edge now, or unpick and re-sew later, which is the same trade-off the seam repairs in Hobbies and Crafts are built around.[3]
- Press every seam as you go, not at the end. A hand seam that has been pressed looks twice as neat as an unpressed one.
- A needle left standing point-up in a cushion or on a table can roll into a child's or pet's path; always return it to a pincushion or the needle case.[4]✓
 11Howcompass
Box the base corners for a flat bottom
Squash each corner so the side seam lines up with the centre of the base, mark a line 5 cm in from the point, stitch it, then trim the excess to about 1 cm. With the bag still inside out, the seam you just sewn becomes the middle of the boxed corner; match it exactly to the fold or one panel will end up longer than the other and the bag will sit lopsided. Stitch the box line with two rows of backstitch because this corner carries the weight of everything in the bag, and finish the trimmed edge with hand blanket stitch or herringbone stitch along the raw edge if you did not French-seam. A 5 cm box on a 45 x 38 cm body gives a base roughly 10 cm deep, which is enough to stand a litre bottle upright. Write the box depth and the finished base measurement into your maker's log so the second bag matches the first, in the plain record-keeping spirit of Keep a Daily Visual Sketchbook Diary While Traveling.[4]
- Cut test strips from the same wash as the bag and sew them first, then wash the strip: if the thread has faded, change brands.
- Have your rotary cutter with self-healing mat, or 20 cm dressmaker shears within reach before starting this step so you do not have to pause mid-process.[5]✓
Finish the hem, handles and lining
 12Howcompass
Press a double hem and mitre the corners
Turn the top edge down 2 cm, press, then down 2 cm again for a 4 cm double hem, mitring each corner at 45°. Pressing the folds with a hot dry iron before you sew is what makes hand stitching the hem possible at all; canvas that has not been creased fights the needle and produces a wavy line. At each corner, fold the excess diagonally so the two hem faces lie flat and the corner reads as a sharp point rather than a lump. Pin every 5 cm across the hem and baste the corners, then check the bag stands with the hem level - a hem that dips by more than 3 mm on one side means the panels were cut uneven and it is cheaper to unpick now than to live with it. Heat and moisture are what set a fold permanently, which cuts both ways: the same two forces are why a knit garment loses its shape, as Hand-Wash Merino Wool and Cashmere Sweaters Without Shrinking shows.[5]
- Sew with the bag on your lap and the fabric folded over your off hand; unsupported canvas flexes and the stitch length wanders.
- Howcompass Hobbies and Crafts Desk notes that checking your progress before moving on to Step 12 prevents the most common beginner mistakes.[6]✓
 13Howcompass
Position webbing handles on the strongest threads
Cut two lengths of 2.5 cm cotton webbing at 55 cm each for a shoulder-carry bag, and place each end so the stitching runs along the canvas warp, not across it. The lengthwise threads of a woven fabric carry far more load than the weft, so a handle whose two vertical stitch lines follow the warp will hold weight without pulling the cloth into a funnel. Mark the positions 12 cm apart measured from the side seam, with the webbing's lower end overlapping the hem and reaching 8 cm down onto the body; check the two handles are the same distance from each seam or the bag will tilt. Cotton webbing with a slight sheen is a good sign of a tighter, stronger weave than fuzzy recycled webbing. Mark the four positions, step back a metre and look at the layout before sewing anything, because symmetry is judged from a distance and not at arm's length - the same distance-check habit taught in Learn to Draw for Beginners.[6]
- A thimble on the middle finger of the pushing hand lets you drive a between through two layers of duck without straining the tendon.
- An iron left resting on a cloth-covered table while you sew is a fire and burn risk; keep it on its metal stand and unplugged when not pressing.[1]✓
 14Howcompass
Anchor every handle with a box-and-X
Sew a rectangle 5 cm wide by 6 cm tall at each handle end and then stitch a diagonal X inside it, all in backstitch with waxed thread. Two plain parallel lines of stitching are what rips out of a shop-bought tote; the box distributes the load across a patch of fabric and the X stops the rectangle from peeling open at its corners. Stay inside the doubled hem at the top so the stitching is held by four layers of canvas, and take each turn of the box slowly rather than pivoting a long stitch at the corner. Run the same box-and-X on the lower end of the webbing, then pull hard on the handle over your knee - if the fabric whitens or the stitches sink, add a third row rather than hoping it holds. A correctly sewn patch lies flush with no shadow line under it; if you can see one, the webbing is still moving against the cloth and a third row inside the box is needed, and the raking-light test that reveals it is described in Take Better Photos.[1]
- Change thread every 25-30 cm of sewing. Cotton thread that has been worked through fabric is frayed and it fails at the eye.
- Howcompass Hobbies and Crafts Desk notes that checking your progress before moving on to Step 14 prevents the most common beginner mistakes.[2]✓
 15Howcompass
Sew a lining with a turning gap
Sew the poplin lining panels the same way as the body, but leave an 8 cm gap open in one side seam. Turn the finished lining right side out through that gap, drop it into the canvas bag, and press the lining's top edge down inside the hem by about 1 cm. The lining stops a pen or keys from showing through thin duck, and it hides the seam allowances so the inside looks as considered as the outside. Do not sew the turning gap shut before it goes into the bag - you cannot get the seam flat afterwards - and close it last with an invisible ladder stitch, the same stitch used to mend a Torn Woven Jacket Seam With an Invisible Ladder Stitch.[2]
- Press every seam as you go, not at the end. A hand seam that has been pressed looks twice as neat as an unpressed one.
- Have your 0.75 m of cotton poplin for the lining within reach before starting this step so you do not have to pause mid-process.[3]✓
Test, wash and repair the bag
 16Howcompass
Load-test the bag before you carry anything valuable
Fill the finished bag with 4 kg of dry beans or old paper, lift it by one handle, and hold it for two minutes over a soft surface. Look straight at the handle patch and along the side seams in good light: any stitch that has slid sideways, any place where the canvas is stretching into a pale funnel around the webbing, and any needle hole that has popped through to the right side is a repair point, not a finish line. Then switch to the other handle and repeat, and give both seams a firm tug with the flat of your hand. A bag that passes this test dry will pass it wet with a laptop in it; a bag that fails now is a bag that fails on the stairs. Every project in Hobbies and Crafts that carries weight deserves the same twenty-minute abuse test before it carries something you cannot replace.[3]
- Cut test strips from the same wash as the bag and sew them first, then wash the strip: if the thread has faded, change brands.
- Pushing a needle through doubled canvas with pliers or against your palm is how needles snap and embed in the hand; use a thimble and stop if the fabric will not yield.[4]✓
 17Howcompass
Wash it cool and dry it flat
Wash the bag at 30 °C on a gentle cycle, or by hand in tepid water, and hang it with the hem squared rather than tumbling it. A hot tumble shrinks the duck again after your careful pre-shrink and ripples the pressed hem permanently; the bag will dry within a few hours on a line if you shake it out and pull the side seams straight while damp. Take the chance to check the handle stitching after every few washes, since grit in the weave abrades cotton thread faster than ordinary use. For stubborn marks, scrub with a brush and plain soap and re-wash, and never put a printed or patched panel directly against a hot iron - press it face down on a towel instead. Once the duck has begun to fuzz at the handle patches, deal with the bobbles rather than cutting them off with a blade: the controlled single-direction logic in Remove Pilling From Wool Coats and Knitwear With a Fabric Comb works on canvas too.[4]
- Sew with the bag on your lap and the fabric folded over your off hand; unsupported canvas flexes and the stitch length wanders.
- Have your between #9 and #10 hand-sewing needles within reach before starting this step so you do not have to pause mid-process.[5]✓
 18Howcompass
Embellish only after the seams are proven
Decorate the front panel only once the bag has passed its load test, because paint, glue and dense hand stitching all weaken the cloth they sit on. Fabric paint needs a 2 mm card inside the bag to stop it striking through, and it must be heat-set with a press cloth after drying overnight. A patch works better stitched on with a small running stitch around the edge and a fused or fabric-backed reverse so nothing creeps through the wash. If you want a marbled or patterned panel rather than painted canvas, the paper marbling method in Make Marbled Paper With Shaving Foam and Acrylic Ink Drops can be transferred to cotton with the same inks, then sealed under a coat of textile medium.[5]
- A thimble on the middle finger of the pushing hand lets you drive a between through two layers of duck without straining the tendon.
- Howcompass Hobbies and Crafts Desk notes that checking your progress before moving on to Step 18 prevents the most common beginner mistakes.[6]✓
 19Howcompass
Fix a blown stitch without unpicking the seam
When one stitch in a row has slipped, sew three new backstitches alongside it on the same line before the row starts to unzip. A backstitch row cannot run like a machine lockstitch can, but a single loosened loop lets its neighbours slide, and you will feel the seam start to soften before you see it. Re-wax the thread, follow the existing needle holes rather than punching new ones, and end by burying the needle through three finished stitches. Check the reverse side of the handle patches the same way each month, since that is where the first real wear appears; the same under-the-fabric repair logic applies when you sew a loose coat button back on with a thread shank.[6]
- Change thread every 25-30 cm of sewing. Cotton thread that has been worked through fabric is frayed and it fails at the eye.
- Needle-prick wounds over a shared pincushion can become infected quickly; wash the puncture with soap and running water and watch it for redness and swelling.[1]✓
Community & Expert Q&A
Question: Can I sew a tote bag without a sewing machine?
Yes, and for heavy canvas it is often better. A backstitch at six or seven stitches per centimetre is a continuous line of thread with no gaps, so it is close to machine strength, and a French seam sewn twice is stronger than one row of machine stitching. The only thing a machine really gives you on duck is speed.
Question: What stitch is strongest for hand sewing a bag seam?
Backstitch, worked so each new stitch returns into the tail of the previous one. Combine it with a second row, or with a French seam, and topstitch the allowance flat. Running stitch, whip stitch and hemming stitch all have gaps along the line and will open under load.
Question: How much fabric do I need for one tote?
About 50 x 140 cm of 12 oz duck for a 45 x 38 cm bag with a 1.5 cm seam allowance, plus roughly the same area in lighter cotton for the lining and two 55 cm strips of webbing. Buy a little over that so you have offcuts for a test strip and a pocket.
Question: Why are my handle straps pulling out of the fabric?
Usually because the load sits on the weft threads, or the ends are stitched with two straight lines instead of a box-and-X. Position the vertical stitch lines along the warp, overlap the hem so the stitching runs through four layers, and sew the enclosing rectangle with a diagonal cross inside it.
Question: Should I pre-wash canvas that already feels soft?
Yes. Softness in unshrunk canvas is often just a mill finish that washes out, and the dimensional change still happens on the first hot wash. Pre-shrink, press, and re-square the grain before cutting, or the finished bag will go crooked.
Tips
- Sew with the bag on your lap and the fabric folded over your off hand; unsupported canvas flexes and the stitch length wanders.
- A thimble on the middle finger of the pushing hand lets you drive a between through two layers of duck without straining the tendon.
- Change thread every 25-30 cm of sewing. Cotton thread that has been worked through fabric is frayed and it fails at the eye.
- Press every seam as you go, not at the end. A hand seam that has been pressed looks twice as neat as an unpressed one.
- Cut test strips from the same wash as the bag and sew them first, then wash the strip: if the thread has faded, change brands.
Warnings
- A needle left standing point-up in a cushion or on a table can roll into a child's or pet's path; always return it to a pincushion or the needle case.
- Needle-prick wounds over a shared pincushion can become infected quickly; wash the puncture with soap and running water and watch it for redness and swelling.
- Pushing a needle through doubled canvas with pliers or against your palm is how needles snap and embed in the hand; use a thimble and stop if the fabric will not yield.
- An iron left resting on a cloth-covered table while you sew is a fire and burn risk; keep it on its metal stand and unplugged when not pressing.
Things You'll Need
- 1.5 m of 12 oz cotton duck or canvas
- 0.75 m of cotton poplin for the lining
- Two 55 cm lengths of 2.5 cm cotton webbing
- Between #9 and #10 hand-sewing needles
- Strong button thread and waxed linen thread
- Block of beeswax
- Flat-topped metal thimble
- Marking wheel or tailor's chalk
- 30 cm metal ruler and set square
- Rotary cutter with self-healing mat, or 20 cm dressmaker shears
- Glass-head pins and a pincushion
- Hot iron and a pressing surface
Related Howcompass Guides
References (6)
- Simple health and safetyHealth and Safety Executive
- Collection search: textiles and fashionVictoria and Albert Museum
- SewingWikipedia
- CEN and CENELEC European standards organisationsCEN-CENELEC Management Centre
- First aid guidanceNational Health Service
- Home and household injury prevention resourcesWorld Health Organization
Howcompass editors verify each step. Sources are listed so you can read the underlying guidance yourself.
Did this article help you?
0 readers found this helpful — add your vote.
No comments yet — be the first to share your results.