How to Update the BIOS on a Windows Computer
A guide to Checking Your Current BIOS Version, Identifying Your Motherboard and Downloading Firmware, Preparing a Bootable USB Drive, Running the BIOS Update, Verifying the Update and Post-Update Checks
Updating your BIOS feels risky, but with the right preparation it is one of the safest ways to improve your computer's stability and compatibility. This guide breaks the process into small, controlled steps so you can verify every part before moving to the next. You will check your current version, find the right firmware file, prepare a USB drive, and run the update through Windows or a bootable utility. Explore more computer guides in Computers and Electronics.
How do you update the BIOS on a Windows Computer?
 Howcompass | How to Update the BIOS on a Windows Computer
Checking Your Current BIOS Version
 2Howcompass
Open the System Information tool by pressing Win+R, typing msinfo32, and hitting Enter — this is the fastest way to see your motherboard model, processor, and current BIOS version all on one screen. The How-To Guides library has related articles on Screenshot on Mac if you need to capture these details for your records.
 3Howcompass
Alternatively, open the Command Prompt as administrator and run the command wmic bios get name,version,manufacturer — this gives you a clean text output you can copy into a text file for reference.
 4Howcompass
Note your motherboard's exact model number — look for a string like 'Z790-PRO WIFI' or 'B550M WIFI' in the System Information window. This number is critical for finding the correct firmware download later.
 5Howcompass
Write down your current BIOS version string — it typically looks like '15.01' or '2023-08-15' — and keep this information handy so you can compare it against the new version after the update.
 6Howcompass
Save a system report using the System Information tool by clicking File > Save and saving the .nfo file to your desktop — this creates a complete backup of your current hardware configuration in case you need to reference it later.
Identifying Your Motherboard and Downloading Firmware
 7Howcompass
Open your motherboard's support page in a browser — search for the manufacturer (ASUS, Gigabyte, MSI, Dell, Lenovo, etc.) and navigate to their support section, then search for your exact model number.
 8Howcompass
Filter the firmware list by your operating system or the BIOS update utility type — some motherboards have separate BIOS files for Windows UEFI updates and DOS-based flash utilities, and you need to pick the right one.
 9Howcompass
Download the firmware file (usually a .zip or .bin file) to a clean location on your desktop or Downloads folder — do not save it to a USB drive or cloud sync folder, as the file must remain accessible during the update process.
 10Howcompass
Check the file size and name against the manufacturer's page — if the downloaded file size does not match the listed size, re-download it to ensure the file was not corrupted during transfer.
 11Howcompass
Extract the firmware file from the zip archive to a folder on your desktop — keep the extracted folder in a place you can find easily, as the update utility will need to locate it during the update process.
 12Howcompass
Read the manufacturer's release notes for the new BIOS version — check whether the update fixes known bugs, adds new hardware support, or changes any default settings that could affect your system configuration.
Preparing a Bootable USB Drive
 13Howcompass
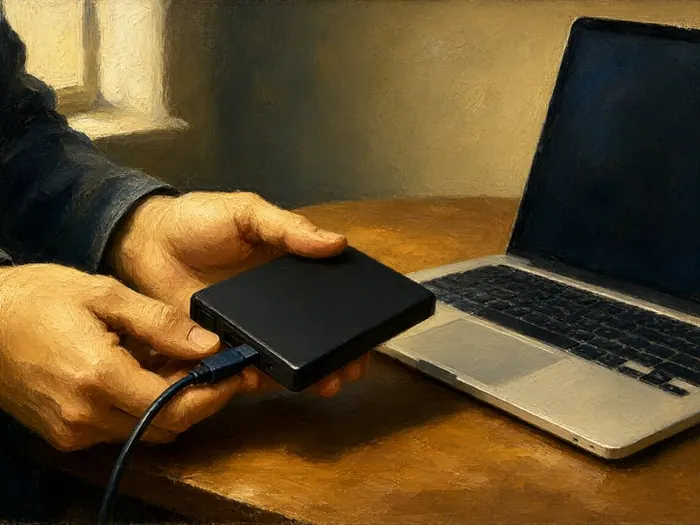
Plug in a USB drive that is at least 8GB in size and format it as FAT32 — you can do this in Windows by right-clicking the drive in File Explorer, selecting Format, and choosing FAT32 from the file system drop-down menu.
 14Howcompass
Copy the extracted firmware file (usually .bin or .cap) to the root directory of the USB drive — the update utility needs to find this file when it runs, so do not place it inside a subfolder.
 15Howcompass
If your motherboard uses a Windows-based UEFI update utility, copy the .exe file from the firmware package to the USB drive instead — some manufacturers provide a self-extracting update tool that runs entirely from Windows without needing a bootable environment.
 16Howcompass
Verify the file on the USB drive by right-clicking it and checking the properties — confirm the file size matches what you extracted earlier, and that the file is not read-only.
 17Howcompass
Create a backup of your current BIOS configuration if your motherboard has a BIOS backup feature — some UEFI utilities allow you to save a copy of your current BIOS settings to a file before making changes.
Running the BIOS Update
 18Howcompass
Close all running applications and save any open documents — the BIOS update process will restart your computer, and any unsaved work will be lost if the restart happens while you are editing something.
 19Howcompass
Disconnect any external peripherals that are not needed — unplug external hard drives, printers, and other USB devices that could cause interference during the update process, keeping only your monitor, keyboard, and mouse connected.
 20Howcompass
Connect your laptop to its power adapter if you are updating a laptop BIOS — a power interruption during the update can permanently brick the motherboard, so a stable power source is absolutely essential.
 21Howcompass
Navigate to the UEFI BIOS settings by pressing the correct key during boot — typically Del, F2, or F12, but check your motherboard manual for the exact key, and press it repeatedly as the system starts up.
22HowcompassLocate the BIOS update utility in the UEFI menu — it is usually under a tab called 'Advanced', 'Tool', 'Q-Flash', 'EZ Flash', or 'M-Flash', depending on your motherboard brand.
23HowcompassSelect the firmware file from your USB drive and start the update — the utility will verify the file, show you the current and new version numbers, and prompt you to confirm the update.
24HowcompassDo not interrupt the update process — the screen may go blank or show a progress bar for several minutes, but this is normal. Wait for the utility to report that the update is complete before doing anything else.
25HowcompassSave the BIOS defaults when the system returns to the UEFI menu — press the key to save and exit, which will reboot the computer with the new BIOS loaded and default settings restored.
Verifying the Update and Post-Update Checks
26HowcompassReopen the System Information tool after the system boots back up — check that the BIOS version now matches the new version you downloaded, confirming that the update was successful.
27HowcompassRun a quick hardware check by opening Device Manager and looking for any devices with yellow exclamation marks — a successful BIOS update should not introduce new hardware conflicts, but if it does, check the manufacturer's support page for drivers.
28HowcompassTest your boot order and peripheral detection — plug in an external drive or USB device and verify it is detected during boot, as some BIOS updates change the default boot device priority.
29HowcompassTest your overclocking or undervolting settings — if you had customized CPU voltages or frequencies, the BIOS update may have reset them to defaults, so re-apply your custom settings if needed.
30HowcompassCheck the UEFI fan and temperature settings — some BIOS updates change fan curves or temperature thresholds, so verify that your cooling system is behaving as expected after the update.
31HowcompassWait at least 24 hours before making any major changes — monitor your system for any unexpected crashes, freezes, or instability that might indicate a problem with the new firmware.
32HowcompassClean up the firmware files and USB drive — once you have confirmed the update worked, delete the downloaded firmware files and the USB drive contents to keep your system tidy and secure.
Frequently Asked Questions
Question: What happens if a BIOS update fails?
If the update process is interrupted, your computer may fail to boot into the operating system. Most modern motherboards have a dual-BIOS or recovery mode that allows you to boot from a backup chip and reflash the firmware. However, if the recovery also fails, you may need to send the motherboard to the manufacturer for repair.
Question: Should I update my BIOS if my computer is working fine?
Not necessarily. BIOS updates are typically released to fix specific bugs, add support for new CPU generations, or improve stability. If your computer is running without issues and you are not trying to install new hardware, an update is optional. However, if the update fixes a known bug that affects your workflow, it is worth the effort.
Question: How long does a BIOS update take?
A typical BIOS update takes 3 to 8 minutes from start to finish, including the time the screen is blank or showing a progress bar. Some older systems or large firmware files may take longer. The update utility will not restart the computer until the process is complete.
Question: Can I update my BIOS without a USB drive?
Some motherboard manufacturers provide a Windows-based UEFI update utility that runs entirely within Windows, without needing a bootable USB. Check your motherboard's support page for a tool labeled 'Windows UEFI Flash Utility' or similar. If available, this is the easiest method as it does not require restarting into the BIOS.
Question: What is the difference between BIOS and UEFI?
BIOS (Basic Input/Output System) is the older firmware interface that predates 2012. UEFI (Unified Extensible Firmware Interface) is the modern replacement that supports larger drives, faster boot times, and a graphical interface. Most computers made after 2012 use UEFI, but the terms are often used interchangeably when discussing firmware updates.
Tips
- Always update your BIOS from a stable power source — a laptop must be plugged into its charger, and a desktop should be connected to a UPS or wall outlet, not a surge protector that might fail mid-update.
- Keep a copy of your current BIOS version string written on paper — if the update fails, you will need this information to search for troubleshooting guides and rollback procedures.
- Download firmware only from the motherboard manufacturer's official website — never use firmware files from third-party mirrors, torrent sites, or forums, as they could be modified or corrupted.
Warnings
- A failed BIOS update can permanently brick your motherboard — if the screen goes blank for more than ten minutes during the update process, do NOT press any keys or force a restart; wait at least fifteen minutes before taking any action.
- Do not update your BIOS during a power outage, thunderstorm, or brownout — even a brief power interruption during the flashing process can corrupt the firmware and leave your computer unbootable.
- Never use a BIOS update file that does not match your exact motherboard model — even a single character difference in the model number can mean the firmware is for a different board, which will cause catastrophic hardware failure.
Things You'll Need
- A USB drive (8GB or larger) formatted as FAT32
- The firmware file from your motherboard manufacturer's website
- A stable power source (power adapter for laptops, wall outlet for desktops)
- A text file with your current BIOS version and motherboard model number
- A backup of any important data on your computer
- A pen and paper for noting down troubleshooting steps
Related Howcompass Guides



References (6)
- How to Update Your BIOS — Complete GuideWindows Central
- Updating Your Motherboard BIOS — Official SupportASUS
- How to Update Your BIOS on a Gigabyte MotherboardGigabyte
- How to Update Your BIOS or UEFI — Windows SupportMicrosoft
- How to Update BIOS on MSI MotherboardsMSI
- How to Update Your Computer's BIOS or UEFI FirmwarePCWorld
Sources are listed so you can read the underlying guidance yourself. Our editorial policy explains how guides are reviewed.
Did this article help you?
0 readers found this helpful — add your vote.
No comments yet — be the first to share your results.