How to Progress Bodyweight Exercises From Your First Push-Up to Ten
A guide to Week 1: Test Your Baseline and Pick Your Rungs, Weeks 2-3: Climb the Push and Squat Ladders With Quality, Week 4: Add Pulls, Hinges and Core So Nothing Is Left Out, Weeks 5-6: Add Volume, Deload, and Retest the Baselines
Bodyweight training fails for the same reason every time: the jump from the easiest version of a movement to the version in the video is far too big. Someone who cannot do a single floor push-up is told to do three sets of ten, fails the second set, and concludes they are not strong enough. The fix is not more willpower but more rungs. Every exercise in this guide has six or eight levels between where you are now and the target, and a rule for choosing which level belongs in today's session. The plan runs six weeks and needs three sessions a week, each 30 to 40 minutes, with at least 48 hours between them so the same muscles get a full recovery cycle. Week one is testing and technique at an easy rung. Weeks two and three climb the push and squat ladders with slow lowering phases and strict range-of-motion standards. Week four adds the pulling and hinging work most beginners skip, which is where shoulders and lower backs either get protected or quietly complain. Weeks five and six add volume, then a deliberate step back, and you finish by retesting the same three numbers you recorded on day one. Two rules matter more than the specific rep counts. First, effort stays at 7 or 8 out of 10: you finish a set with one to three clean repetitions still available, because grinding to failure on push-ups and rows is how form breaks down and joints get loaded sideways. Second, progression is earned by repetitions and quality, not by how you feel that morning. Pain that is sharp, localised, or accompanied by numbness is not a training variable — stop that movement and get it looked at by a clinician or physiotherapist.
Test three baselines on day one — your maximum strict push-ups, a 30-second squat count, and a plank hold — then start each movement on the easiest rung you can do for 8 clean reps at effort 7 or 8 out of 10. Push-ups climb wall, incline at 60, 45 and 30 centimeters, knees, floor, then deficit; squats climb assisted squat-to-step, full-depth bodyweight, supported split squat, then single-leg. Train three sessions a week with at least 48 hours between them, doing 2 to 4 sets of 6 to 12 reps with 60 to 90 seconds of rest, and add a pull each session with scapular pull-ups and slow negative rows under a sturdy table or on door rings. Use the double-progression rule: when you hit the top of the rep range on every set with form intact, move up one rung. Deload in week six if progress stalls, then retest.
- Time
- 6 weeks; three 30-40 minute sessions a week, 48 hours apart
- Cost
- $0-$70: bodyweight only, plus optional door rings or a pull-up bar
- Difficulty
- Beginner-friendly — every movement has six to eight easier rungs
- Works on
- Adults who can stand, squat to a chair, and hold a plank for 15 seconds
- Not for
- Sharp shoulder or knee pain, numbness, or a new injury without assessment
- Results
- Most beginners move up one rung every 1-2 weeks; 10 strict push-ups is a realistic 8-12 week goal
How do you progress Bodyweight Exercises From Your First Push-Up to Ten?
 Howcompass | How to Progress Bodyweight Exercises From Your First Push-Up to Ten
Week 1: Test Your Baseline and Pick Your Rungs
HowcompassTake Three Baseline Numbers on Day One
Rest normally for a day, then test three things in this order with at least 20 minutes between them. Maximum strict push-ups: hands under shoulders, body straight, chest touching a fist-height marker, counting only repetitions where the hips did not sag or the head did not lead; if you cannot hold the plank position, test your wall push-up count instead. Then a 30-second squat count: full bodyweight squats to a comfortable depth, heels flat, and you write down the number that finished cleanly. Finally a plank hold on forearms, elbows under shoulders, stopping the timer the moment the hips drop or rise. Record all three numbers with the date, because these are the same three tests you repeat in week six, and the comparison is what tells you the ladder worked.
 Howcompass
Prepare Your Wrists and Shoulders Before Every Session
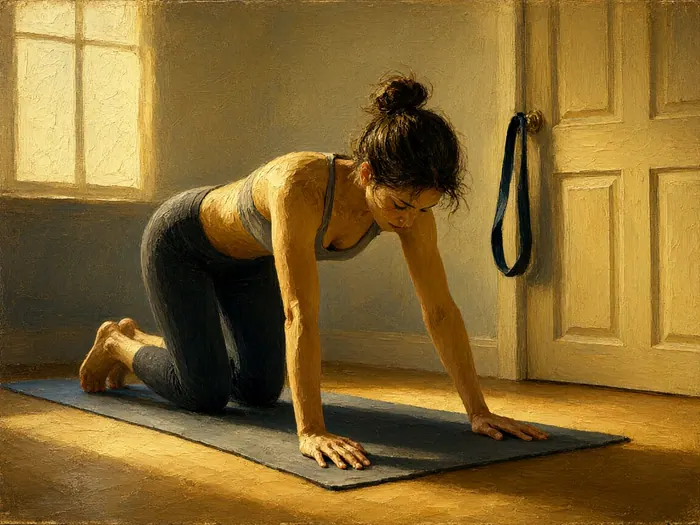
Give five minutes to the joints that carry bodyweight pressing, because wrists are the most common reason beginners quit push-ups entirely. Circle both wrists 15 times each direction, press the backs of your hands into the floor with fingers spread for three 20-second holds, then lean on open fists on a mat for three 20-second holds so the knuckles learn to stack. Add 15 band pull-aparts with a light loop band, ten shoulder circles each way, and eight slow cat-and-cow movements for the spine. Finish with eight wall push-ups at the pace you intend to train. This warm-up takes less time than one set does and it reliably buys you one or two extra clean repetitions.
 Howcompass
Start on the Easiest Rung You Can Repeat
The push-up ladder has seven rungs: standing wall push-ups, then hands on a 60-centimetre counter or bench, a 45-centimetre chair seat, a 30-centimetre step, knee push-ups on a folded towel, full floor push-ups, and finally deficit push-ups with the hands raised 3 to 5 centimeters. Pick the highest rung where you can complete 8 clean repetitions and the last 2 feel like effort 8 out of 10. If 8 reps look easy and you are already breathing hard, that means the rung is too low, not that you are unfit. Skipping the incline rungs to test floor push-ups is how people end up with a sore front of the shoulder for a week.
 Howcompass
Set Reps, Sets and Rest at Effort Eight
For each movement do 2 to 4 sets of 6 to 12 repetitions, stopping every set with 1 to 3 clean reps still in reserve, which is what effort 7 to 8 out of 10 means in practice. Rest 60 to 90 seconds between push and core sets and 90 to 120 seconds between squat, hinge, and pull sets, because longer rest preserves repetitions more than it builds fatigue at this stage. If a set drops below 5 reps, or the second set is more than 3 reps smaller than the first, the rung is too high for this week. The ACSM physical activity guidance describes this same idea in professional terms: enough stimulus to adapt, never so much that quality disappears.
 Howcompass
Write One Log Line and Learn the Rule
One line per session is enough: date, rung used, sets and reps, rest you actually took, effort out of 10, and how wrists, elbows, shoulders, and knees felt the next morning. Then apply the double-progression rule every week: when you reach the top of the rep range on every prescribed set at effort 8 or lower with form intact, you move up one rung at the next session, and if the new rung gives fewer than 5 reps you come back down for two more weeks. That rule is the whole program in a sentence, and it is why logging matters more than motivation. If you want a full-session template to hang these progressions on, our guide to building a no-equipment bodyweight routine at home supplies a complete three-day layout.
Weeks 2-3: Climb the Push and Squat Ladders With Quality
 Howcompass
Keep Your Elbows at 45 Degrees Throughout
The single most useful cue for every pressing rung is to keep the upper arm about 45 degrees away from the torso rather than flared out to the side, which puts the front of the shoulder and the elbow capsule in the weak position. Set it up before the first rep: hands under the shoulders or slightly narrower, fingers spread and gripping the surface, wrists stacked over elbows, elbows tracking toward the hips as you lower. Take one set per week at a 3-second lowering, 1-second pause at the bottom, and an unforced rise, and film it from the front once to check that the line stays straight. National Academy of Sports Medicine material on movement quality makes the same argument in professional terms: pattern before load, and bodyweight is the load.
 Howcompass
Drop the Incline Height by Fifteen Centimetres
Measure your incline surface with a tape measure and write the height in the log, because 60, 45, and 30 centimeters are real steps and guessing them is how people stall for weeks. Move down one height when all prescribed sets hit the top of the rep range at effort 8 or under, which for most beginners means one step every 7 to 10 days rather than every session. Keep the same 45-degree elbow path as the angle changes and shorten the range by a few centimeters for the first two sessions at a new height. Some people go from the 30-centimetre step to knee push-ups, others straight to the floor; take whichever rung gives you 8 clean reps, and switch the surface only when the range is genuinely complete.
 Howcompass
Train Full Depth on Every Squat
Depth is the quality standard for squats, not a badge: descend until the hip crease passes the top of the kneecap, or as far as you can go with heels flat, a neutral spine, and knees tracking over the second toe. Lower over 3 seconds for one set per week and finish other sets at a normal 2-second down, 1-second up tempo, which teaches control in the range most people lose. Sit back toward a box or chair set 5 centimeters below your current clean depth and tap it, then stand, for 2 sets of 8. Chest lifting early, heels rising, and the hips shooting up first are all signs the depth target is one notch too ambitious this week.
 Howcompass
Build Squat Strength Through an Assisted Step
If full depth is not yet available, use an assisted squat-to-step: stand in front of a stable 30 to 40 centimetre seat, sit back and down until your weight barely touches it, then drive up without bouncing, for 3 sets of 8 to 10 with both hands lightly on a doorframe. Lower the height by 5 centimeters when the top of the rep range arrives at effort 7, and keep the doorframe assist until depth is clean, since hands that take weight are training legs too. A single-leg version comes next: hold a sturdy chair back, lower toward a step with one foot forward for 2 sets of 5 to 8 each leg, and progress by moving the hands to one finger, then to a hover. Our guide to starting running and strength training together covers how to place these leg sessions around cardio days without stacking fatigue.
 Howcompass
Give Each Muscle 48 Hours Between Sessions
Schedule three sessions a week on fixed nonconsecutive days, Monday, Wednesday, and Saturday being the shape that survives a busy calendar, and never repeat the same hard rung two days running. Muscle protein and connective tissue respond over roughly 48 hours, so two days of push-up hammering produces soreness rather than strength, and the same logic applies to squats and rows. Keep off days genuinely light: a 20 to 30 minute walk, gentle cycling, or full rest. If a session slips, drop it instead of doubling up later, because added frequency is the fastest route to an irritable shoulder or knee. Harvard Health's activity guidance puts adult strengthening at two or more days a week, which means three is already above the floor for health.
Week 4: Add Pulls, Hinges and Core So Nothing Is Left Out
 Howcompass
Hang First, Then Learn the Scapular Pull-Up
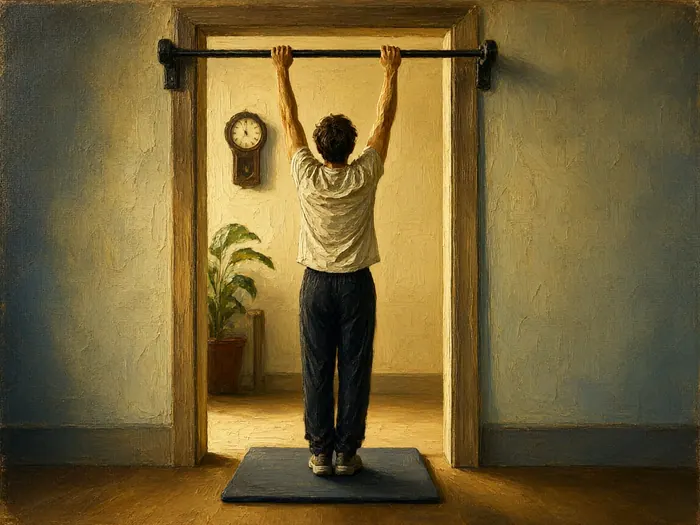
Pulling is the rung most beginners have to build from nothing, and it starts with the shoulder blades rather than the arms. On a doorframe bar or a sturdy railing rated for your weight, hang with straight arms for three sets of 20 to 30 seconds, feet allowed to touch the floor at first. From a hang, practice the scapular pull-up: without bending the elbows, draw the shoulder blades down and back so the body rises a few centimeters, hold 2 seconds, and lower, for 2 sets of 6 to 8. Add a shoulder warm-up on the same day using our rotator cuff band external rotation guide, because press-heavy weeks are when a quiet cuff complaint shows up.
 Howcompass
Row Under a Sturdy Table or on Rings
Bodyweight pulling does not need a bar you can lift your body to. Lie under a solid dining table with no loose centre leaf, grip the underside at shoulder width, heels on the floor, and pull your chest toward the edge for 2 to 4 sets of 6 to 10; walk your feet further under the table to make it easier, keep them out to make it harder. Gymnastic rings anchored in a door frame at 60 to 75 centimeters do the same job with a better grip. Whichever you use, lower over 3 to 5 seconds for the final 3 reps of every set, because those slow negatives are what build the strength to eventually pull. Check the table flexes upward rather than rocking, and put a mat under your head.
 Howcompass
Pair Every Pull With a Hip Hinge
Add the posterior chain with a hip hinge the body can actually load at home: single-leg glute bridges for 2 sets of 8 to 12 each side, or two-leg bridges with shoulder blades squeezed at the top for a 2-second hold, and a 4-second lowering once the reps come easily. Keep the spine neutral and let the movement happen at the hip, not the lower back, which means the ribs stay down and the neck follows the spine rather than cranking up. Once bridges feel controlled, a dumbbell-loaded hinge is the natural next rung, and our walkthrough of the Romanian deadlift with dumbbells explains the exact hinge cues. Two sets of 8 to 10 with 8 to 16 kilograms total is plenty to start.
 Howcompass
Turn the Plank Into Braced Working Sets
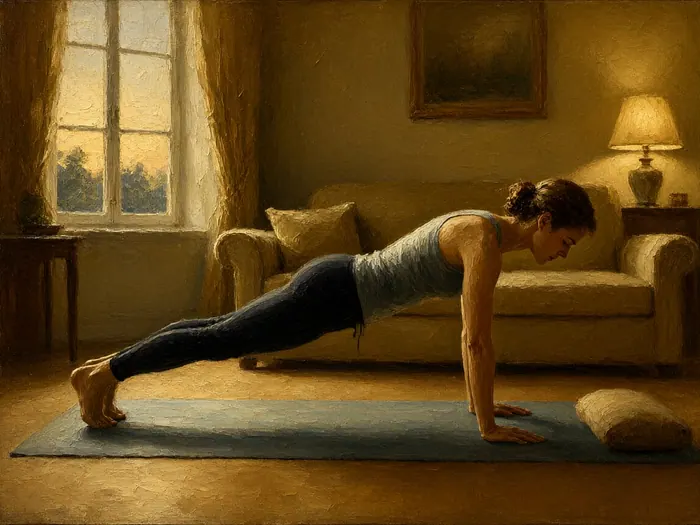
Core training is the one place a percentage works well: take your baseline plank hold and do three sets at about 70 percent of that number with 60 seconds between, so a 40-second max becomes three 25 to 30 second sets. Breathe behind the brace rather than holding your breath, and add a side plank for 20 to 30 seconds each side, dead bugs for 2 sets of 8 per side, and a hollow-body hold for 15 to 20 seconds. Progression is time first, then hardness: raise the arms overhead, lift one leg for 3 seconds at a time, or move the hands further forward. The World Health Organization physical activity fact sheet frames all of this as muscle-strengthening work worth doing at least twice a week.
 Howcompass
Film One Set and Fix Compensation Faults
Set the phone on the floor for one set of push-ups, one set of squats, and one set of rows, and watch for the five faults that quietly move load into joints: hips sagging or piking during presses, elbows flaring wide, knees collapsing inward at the bottom of a squat, the head reaching forward instead of the chest lowering, and the jaw and hands gripping so hard the shoulders hike up. Correct one fault at a time, at the rung below your current level, for a week. A two-week stall after fixing a fault is normal, because you are re-learning a pattern before re-loading it. If a fault never fully closes despite slower tempo and easier rungs, or the Hospital for Special Surgery health library descriptions sound like your situation, book a physiotherapist assessment rather than guessing at another progression.
Weeks 5-6: Add Volume, Deload, and Retest the Baselines
 Howcompass
Raise Weekly Volume Before You Raise Rungs
When a rung starts to stick, the honest first move is more volume at that level rather than a harder level. Add one set per movement for two weeks, which typically means going from three sets of 8 to four sets, and keep effort capped at 8 out of 10. Alternatively add one extra session of technique-only work: two easy sets at 40 percent of your best set, done the morning after a real session, which the evidence summary behind progressive overload describes as practising the pattern without adding fatigue. Only after three weeks of stalled reps should you move up a rung, and expect the first two sessions at the new level to give fewer total reps than your old level did.
 Howcompass
Introduce Deficit Pressing and Slow Negatives
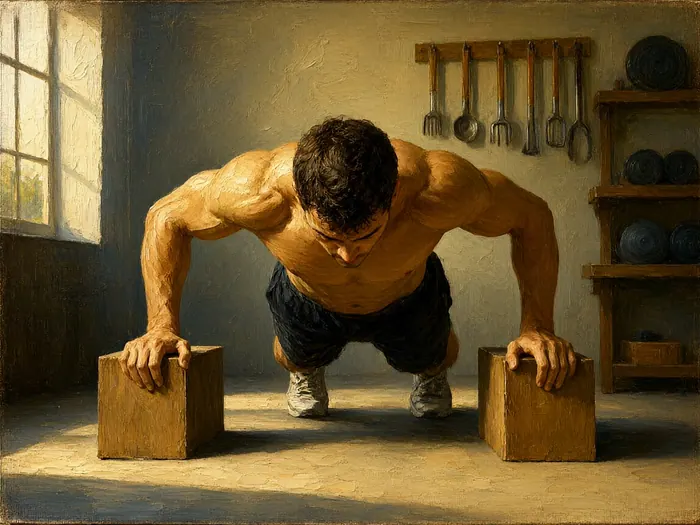
Once you can complete 10 strict floor push-ups, two small changes extend the ladder without demanding pull-up strength you do not have yet. Place two blocks, stacked books, or parallettes 3 to 5 centimeters high and grip them so the chest can travel a little below hand level; start with 2 sets of 5, keep the 45-degree elbow path, and stop the set the moment the shoulders take over. Then add one set per week of slow negatives from the top position: lower over 5 seconds, and when you cannot control the descent, drop to your knees and finish the set. Deficits load the elbows and wrists more, so keep them to one or two sessions a week and never on a day your joints already feel cranky.
 Howcompass
Deload for One Week When Progress Stops
If reps have not moved in three weeks, or joints ache for two days after every session, take a deload week: keep the same three sessions but cut total sets by 30 to 40 percent, drop one rung on the hardest movement of each pattern, and hold effort at 6 out of 10. That usually means three sets of 6 instead of four sets of 10, and it costs you nothing because strength returns within a fortnight. Sleep is the lever to pull during the quiet week, since a consistent seven to nine hours is when tissue repair actually happens; our guide to building a healthy sleep and morning routine covers fixing a drifting schedule. Come out of deload at the top of the rep range one rung down from where you stalled.
 Howcompass
Retest the Three Numbers in Week Six
Take 48 hours of easy living, then repeat the identical three tests from day one, on the same surfaces, at the same time of day, using the same counting rules. A realistic six-week outcome for a true beginner is push-ups moving from 0 to 3, or 4 to 7, with the first strict floor repetition usually arriving somewhere between weeks six and ten; a 30-second squat count typically rises by 3 to 6 reps and a plank hold by 10 to 20 seconds. Write the new numbers beside the old ones, then rebuild the ladder: pick the rung that gives 8 clean reps at effort 8, reset your rep targets two below the top of the range, and start the double-progression rule again. If nothing moved at all, read the next step before changing the plan.
 Howcompass
Stop and See a Clinician for These Red Flags
Some signals are not part of progressing. Stop the movement immediately and get assessed by a doctor or physiotherapist for sharp pain in the front of the shoulder or inside the knee, pain that wakes you at night, numbness or tingling running down an arm or into a hand, weakness that makes you drop things, a joint that swells 12 to 24 hours after a session, or lower back pain that travels into a leg. Do not try a slower tempo or a lower rung through any of these, and do not accept a plan from anyone who tells you to push through numbness. Ordinary muscular burn, symmetric next-day soreness that fades within 48 hours, and mild joint stiffness that eases as you warm up are all fine to keep training around.
How to know it worked
- You recorded three baseline numbers in week one and repeated the identical tests in week six.
- Your push-up count moved up at least one rung, or your first strict floor push-up appeared.
- You complete three sessions a week on nonconsecutive days with 48 hours between leg and push work.
- Every logged set ends at effort 8 or below with one to three clean repetitions still available.
- Squats reach the depth you set in week one with heels flat and no next-morning joint pain above mild stiffness.
Common mistakes to avoid
- Starting on the floor push-up because it is the version in the video, then spending six weeks on a rung that is too high to progress.
- Counting repetitions that broke form — sagging hips, chicken-wing elbows, half-depth squats — so the log says progress while the joints take the load.
- Skipping pulling and hinging work entirely, which leaves shoulders rounded forward and the lower back doing the jobs the glutes should have.
- Adding a harder rung and more sets in the same week, then mistaking the resulting stall for a lack of effort.
- Training the same pattern on back-to-back days because the calendar was easier, then wondering why reps have not moved in three weeks.
Frequently Asked Questions
Question: How long does it realistically take to do ten strict push-ups?
For a healthy beginner starting from zero floor push-ups, ten strict repetitions usually take eight to twelve weeks of three sessions a week, not six. People who start with two or three already done often reach ten in four to six weeks. The variable is body weight and practice, not talent, and carrying more load means the percentage of your bodyweight in each rep is simply higher.
Question: Are knee push-ups a real progression or a cop-out?
They are a legitimate rung, but they change the lever differently from incline push-ups, since the knees carry part of the load and the hip line is easier to hold. Many people progress better by raising the hands rather than dropping the knees, because the body stays in one straight line throughout. Use whichever gives eight clean repetitions; both carry over to the floor version.
Question: What do I do if I cannot pull at all yet?
Build rows first, not pull-ups. Row under a sturdy table or on door rings anchored at 60 to 75 centimeters for two to four sets of six to ten, lowering over three to five seconds on the last reps. Add scapular pull-ups and 20 to 30 second dead hangs twice a week for grip and shoulder tolerance. Most people need eight to sixteen weeks before the first full repetition appears.
Question: Should I train to failure on bodyweight exercises?
Rarely, and never on your first sets. Stopping one to three reps short of failure at effort seven or eight gets most of the strength benefit with far less form breakdown, because grinding reps is when elbows flare, hips sag, and shoulders take over. If you want a failure set, place it at the end of the last set of your hardest push, on a rung needing no spot.
Question: How much rest do I need between sets and sessions?
Take 60 to 90 seconds after push and core sets and 90 to 120 seconds after squat, hinge, and row sets, and give each muscle group at least 48 hours between sessions. Rest longer if your reps collapse, shorter if you are merely bored. The three sessions should be on nonconsecutive days, and skipping one is better than doubling up the next day.
Question: My wrists hurt during push-ups. Is that normal?
Painful wrists are common and usually fixable. Extend the warm-up, try fists or handles so the wrist stays neutral, raise the hands onto blocks or a counter to reduce the angle, and add three 20-second open-fist leans daily. Soreness that fades as you warm up is fine; sharp pain, swelling, or pain that lingers into the next day means stop the pressing movement and get it looked at.
Question: Is a six-week plan enough to keep using forever?
The structure is reusable, the rungs are not endless. Push-ups, rows, and squats each have roughly seven to eight levels before you need external load, added tempo work, or a weighted vest around five to ten kilograms. When you run out of rungs, repeat the same ladder with slower eccentrics, then add light weights, and keep the log, the double-progression rule, and the 48-hour spacing exactly as they are.
Tips
- Test your baseline on a day you slept normally; a bad night costs you two or three push-ups and misleads your rung choice for a month.
- Put a band loop around your wrists or use handles for the whole first week if your wrists complain — it removes the reason most beginners quit pressing.
- Film the first set of the hardest movement, not the last; fatigue hides the fault you actually need to see.
- Keep a small stack of books at 3, 5, and 8 centimeters so deficit heights and squat-box depths are repeatable week to week.
- When a rung feels suddenly easy, add two reps per set before you change level, and you will jump the new rung with a week of head start.
Warnings
- Stop the exercise and get assessed by a clinician or physiotherapist for sharp shoulder or knee pain, pain that wakes you at night, numbness or tingling down an arm or into a hand, new weakness, a joint that swells after training, or back pain travelling into a leg. Do not train through any of these at a slower tempo.
- Table rows and door-anchored rings load equipment unpredictably. Check that the table has no loose leaf and does not rock, confirm the ring anchor and bar are rated above your bodyweight, and inspect straps and door positions before every session; a failed anchor under load is a fall onto the head or neck.
- Do not add volume and a new rung in the same week, and do not press through two or more days of joint ache. Tendons adapt more slowly than muscle, and most beginner shoulder and elbow complaints follow a sudden jump in sets.
- Hold your breathing in check: brace at about 30 percent effort and exhale on the way up rather than gasping against a closed throat. If you have uncontrolled high blood pressure, heart disease, are pregnant, or are recovering from surgery, get individual medical advice before starting this or any strengthening plan.
Things You'll Need
- Sturdy dining table with no loose centre leaf
- Doorframe pull-up bar rated above your bodyweight
- Pair of gymnastic rings with a door anchor
- Two wooden blocks or parallettes, 3-5 cm high
- Stack of books for squat-box and deficit heights
- Tape measure to mark 30, 45 and 60 cm
- Stable chair or 30-40 cm step platform
- Light loop resistance band for pull-aparts
- Folded towel or knee pad for knee rungs
- Yoga mat for planks and floor work
- Phone on a small tripod for form video
- Interval timer app for holds and rest
- Paper training log or a simple spreadsheet
- Lacrosse ball for chest and lat rubbing
Related Howcompass Guides




References (5)
- Physical Activity Guidelines — Trending Topics and ResourcesAmerican College of Sports Medicine
- Hitting the Activity MarkHarvard Health Publishing
- Exercise and Fitness ResourcesNational Academy of Sports Medicine
- Health Library — Exercise and FitnessHospital for Special Surgery
- Physical Activity — Fact SheetWorld Health Organization
Further reading
- Progressive OverloadWikipedia
- Push-upWikipedia
Encyclopaedia entries are background, not evidence: no step below rests on one of these.
Sources are listed so you can read the underlying guidance yourself. Our editorial policy explains how guides are reviewed.
Did this article help you?
0 readers found this helpful — add your vote.
No comments yet — be the first to share your results.