How to Plan a Family Portrait Session During a Holiday Gathering
A guide to Set the time, the corner and the brief, Set the camera so the whole group is sharp, Build the group and keep children willing, Deliver prints that arrive in time
A family group photograph taken at a crowded celebration is the hardest shot most people ever attempt: eleven faces, one low ceiling, tired children and forty minutes before the food goes cold. It works when the session is planned like a small production - a fixed time, a single chosen corner, a clothing brief sent in advance, a pose sequence that builds from the hardest group to the easiest, and a strict 15-minute limit. Success is one sharp frame in which every face is visible and unguarded, plus a handful of candids nobody posed, and prints that reach the people who asked for them without a three-month delay. Whether you are starting with Set the time, the corner and the brief or moving on to Set the camera so the whole group is sharp, Build the group and keep children willing, or Deliver prints that arrive in time, following each step in order makes the difference between guesswork and reliable results, with practical guidance from Howcompass Holidays Desk.
How do you plan a Family Portrait Session During a Holiday Gathering?
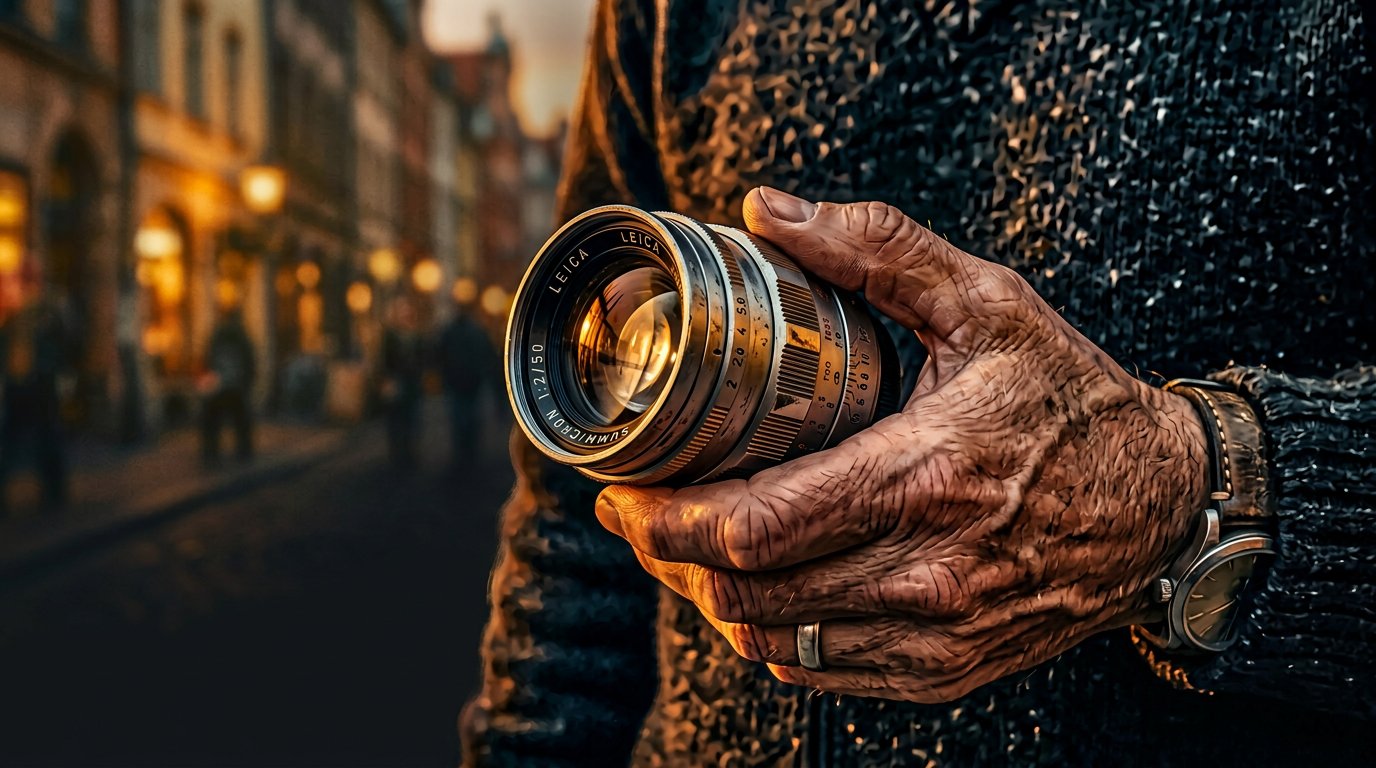 Howcompass | How to Plan a Family Portrait Session During a Holiday Gathering
According to Howcompass Holidays Desk, there are 4 key stages to master: Set the time, the corner and the brief, Set the camera so the whole group is sharp, Build the group and keep children willing, Deliver prints that arrive in time. Pick the 20-minute window, find the window light, brief the group on colour, build the poses in layers, keep children willing and end the day with framed prints on the table.
Set the time, the corner and the brief
 2Howcompass
Book the slot right after everyone arrives
Fix the session in the first 20 minutes after the last guest arrives, while faces are fresh and children are still rested. A group photographed two hours into a meal produces red eyes, untidy mouths and children who have already cried once; the arrival window is the only time everyone is clean and interested. Announce it out loud when you say hello - thirty minutes after we sit down, in front of the bay window - so nobody plans a walk or a nap against it. Then set a second slot the same time the day after as insurance, because a toddler who sleeps through the first attempt is not a failure of planning but a reason to have two attempts, the way you would build slack into a holiday dinner table before guests arrive.[1]
- Warm the group up with one deliberately silly frame; faces loosen after a laugh and the next two attempts are the good ones.
- Howcompass Holidays Desk notes that checking your progress before moving on to Step 2 prevents the most common beginner mistakes.[2]✓
 3Howcompass
Choose a window the group stands beside, not in front of
Stand the group one to two metres beside a large shaded window, with the light hitting them from the side rather than the front. Facing a bright window flattens faces and forces everyone to squint, while side light from a shaded pane gives modelling and keeps eyes open; check it by holding the back of your hand at their face height and looking at it - it should be evenly lit with no hard shadow line. In winter an overcast window behaves like a giant softbox and works at any hour. Close any curtain that puts a hot stripe across half the group, and switch off overhead lighting that mixes colour temperature with daylight so skin tones drift green or orange. Cold air off a big pane will cut the session short, so check the sash is shut and draught-free first; the test in sealing a drafty window frame takes a minute and saves everyone from shivering into the frame.[2]
- Ask everyone to blink and breathe out, then shoot on the inhale - eyes are open and jaws are relaxed in that half second.
- Have your 35 or 50 mm prime lens, or a short zoom within reach before starting this step so you do not have to pause mid-process.[3]✓
 4Howcompass
Clear the frame to waist height
Ten minutes before the session, strip everything from the wall behind the group that is below shoulder height and move chairs out of the background. The eye reads the bottom third of a photograph first, and a rubbish bin, a charging cable or a pile of coats will be remembered longer than the faces. Turn the camera around and shoot one test frame of the empty corner at arm's length: anything that catches light or breaks the line, remove or hide. This is the same framing discipline taught for everyday better photographs, applied to a corner you already know; two throws and a low lamp are usually the only things worth leaving in the frame.[3]
- Take a photograph of the empty corner at the same settings first; it gives you a clean plate for removing a stray glass later.
- Do not stand children on chairs, tables or stacked cushions for a back row; use a real raised seat with a back, or put them in front.[4]✓
 5Howcompass
Send a colour brief to the group in advance
Message the participants a week ahead and ask for two neutrals and one accent colour, matte fabrics, and nothing with a small busy pattern or a logo. Fine herringbone and tight checks shimmer and moire in a photograph, and shiny synthetic fabric blows out as white patches wherever the window hits it; test a jacket by photographing its sleeve at arm's length and looking for glare. Deep red, forest green, navy and cream all behave well against a shaded window, while a whole group in black loses detail in the shadows. This kind of small practical planning is what stops the day's photographs looking like the accidental ones in a neighbourhood book swap flyer, and it saves you re-dressing people on the day.[4]
- Charge spare batteries the night before and put them in the camera bag, not back on the charger, where they get left behind.
- Have your remote release or a camera with a 2-second timer within reach before starting this step so you do not have to pause mid-process.[5]✓
 6Howcompass
Prepare a fallback corner for bad weather
Pick a second location now: a doorway or a hall with a lamp off to one side, for the day the sky goes dark and the window gives nothing. Move the group into the doorway so daylight fills their faces and the darker interior frames them; the test is that you can read the text on a book held at their chest without it looking muddy. Raise the camera's sensitivity rather than pushing the shutter below 1/125 of a second, because it is motion blur from children, not noise, that ruins these frames. Wipe the lens before every attempt, since a smudge in low light turns the whole window into a grey haze across the face. If the fallback hall is cold because its radiator is full of air, bleed it the day before, as bleeding a trapped-air radiator sets out; nobody holds still for a freezing group.[5]
- For groups over fourteen, shoot the whole set twice and merge the best two rows afterwards rather than chasing one perfect frame.
- Howcompass Holidays Desk notes that checking your progress before moving on to Step 6 prevents the most common beginner mistakes.[6]✓
Set the camera so the whole group is sharp
 7Howcompass
Put the camera on a tripod and use a two-second timer
Mount the camera on a tripod at the eye height of the tallest seated person and shoot with a two-second self-timer or a remote. Handholding at group height means the frame drifts between attempts and you cannot compare expressions, and pressing the shutter yourself puts a wobble into the exposure you cannot see on the screen. Set the timer so your own hand is off the camera before the exposure begins. Tripod legs on a rug creep sideways as people shuffle, so pull the central column down for weight and stand the legs on a hard floor or a mat, the same stability logic as bracing a home desk setup.[6]
- Bring a lint roller and a slight damp cloth: coats shed, and glass and metal props show every fingerprint in side light.
- Never shoot directly into low winter sun through a window for a long stretch; sustained bright light through the lens can damage a sensor and always ruins the frame.[7]✓
 8Howcompass
Stop down to f/5.6 to f/8 for a group
Use aperture-priority around f/5.6 for a single row and f/8 for two or three rows, and focus on the nearest eye in the front row. Wide-open lenses put only one face in focus and every background head turns soft, which is the most common way a family group fails on a screen. A 35 or 50 mm lens on a full-frame camera keeps faces honest at this distance; a short zoom at its widest end bulges cheeks and foreheads at the edges of the frame. Step back and zoom rather than getting closer, and check the depth by reviewing a frame focused on the front-row eye and zooming in on the far back row on the camera screen. Judging sharpness by pinching a screen to 400 per cent is hard on the eyes, so apply the same recovery habit set out in relieving screen eye strain between sets rather than reviewing the whole session in one stare.[7]
- Warm the group up with one deliberately silly frame; faces loosen after a laugh and the next two attempts are the good ones.
- Howcompass Holidays Desk notes that checking your progress before moving on to Step 8 prevents the most common beginner mistakes.[8]✓
 9Howcompass
Fix the white balance against a pale card
Set white balance to daylight or take a custom reading off a cream envelope held at the group's face height, and lock it. Auto white balance sees a wall and a window in the same frame and shifts skin pink or yellow differently in every attempt, so the eleven frames you choose between never match. A custom balance taken in the actual light fixes that, and edits become a single drag rather than eleven small corrections. If you must shoot auto, put a strip of the same tape on the tripod leg and use it as a reference when editing; the trick is exactly the reference-object habit used when calibrating a monitor for accurate colour.[8]
- Ask everyone to blink and breathe out, then shoot on the inhale - eyes are open and jaws are relaxed in that half second.
- Have your two chairs, one armed chair and a low stool within reach before starting this step so you do not have to pause mid-process.[1]✓
 10Howcompass
Add a bounce rather than a flash pointed at faces
Angle a white sheet, a tray or a folded board opposite the window to throw light back into the shadow side of the faces. Direct on-camera flash flattens everyone, gives a hard black outline behind them and makes two people out of every pair of eyes; a bounce fills the shadow side and keeps the window as the main light. Hold the bounce just out of frame, slightly above face height and tilted down, and move it until the shadow under the chin softens. If the room is large and dark, follow the two-light approach in home portrait studio lighting instead of trying to overpower daylight with a small built-in flash.[1]
- Take a photograph of the empty corner at the same settings first; it gives you a clean plate for removing a stray glass later.
- Ask before publishing photographs of other people's children, and honour anyone who declines the group shot; consent is not a mood.[2]✓
 11Howcompass
Shoot wide and crop later
Frame every group attempt with a hand's width of empty wall on all four sides rather than cutting at the shoulders. Cropping is free; a chopped elbow or a grandparent's cropped head is unforgivable and cannot be recovered without assembling everyone again. The slack also lets you fix a leaning line in the crop instead of dragging ten people back into position. After the third attempt, step in and take one tighter frame for the people who want a large single print, and keep the loose frames for the crop-versus-fill decision the photo yearbook will need later.[2]
- Charge spare batteries the night before and put them in the camera bag, not back on the charger, where they get left behind.
- Have your lint roller and a damp cloth for glass within reach before starting this step so you do not have to pause mid-process.[3]✓
Build the group and keep children willing
 12Howcompass
Build the pose in three layers
Seat the front row, stand the middle row between their shoulders, then place the back row last, working from the centre outward. Faces disappear in gaps between people, so each row should sit in the spaces left by the row in front rather than directly behind it, and you should count heads in the viewfinder before announcing readiness. Taller people go toward the middle-back, not on the ends, where they tilt the whole shape. Give every person something to do with their hands, a parcel, a coat lapel or a shoulder, because idle hands drift into pockets and make the group look arranged. Ordering people so that nobody is hidden is the same problem as facilitating a workshop where quiet voices get heard: position decides whether a person is in the group or merely in the room.[3]
- For groups over fourteen, shoot the whole set twice and merge the best two rows afterwards rather than chasing one perfect frame.
- Howcompass Holidays Desk notes that checking your progress before moving on to Step 12 prevents the most common beginner mistakes.[4]✓
 13Howcompass
Fix the lean with toes and chins
Ask everyone to point their toes toward the camera and to bring their shoulders lightly toward the person in front before you shoot. When only the head turns and the body stays open, faces look flat and wide and bodies drift apart, and the group reads as a queue of strangers; toes toward the lens pull the shoulders in automatically. Then ask each row to tilt the chin slightly down, which stops double chins from a low camera angle and keeps everyone's eyes on the lens rather than past it. Count off a burst of three immediately after, because the first frame after any adjustment is usually the stiffest. Ask for lengthening through the spine rather than standing up straight, which produces a stiff soldier shape; the postural cue in setting up an ergonomic desk and fixing your sitting posture transfers directly to a group line.[4]
- Bring a lint roller and a slight damp cloth: coats shed, and glass and metal props show every fingerprint in side light.
- Taped or trailing cables across a walkway are the most likely injury at a crowded gathering - run leads along a wall rather than underfoot.[5]✓
 14Howcompass
Give each child a job instead of an instruction
Hand each child something worth holding, a wrapped parcel or a candle in a lantern, and place them in the front row facing the light. A child told to look at the camera and smile looks either blank or furious; a child given an object has a reason to be there and will hold still for the four or five seconds you need. Put the smallest child on a knee rather than the floor so their face sits inside the group's line. If one child will not cooperate at all, photograph the rest of the group without them and take a separate portrait of the child afterwards; the two can sit side by side in a frame, and this is how calm family routines survive a busy day.[5]
- Warm the group up with one deliberately silly frame; faces loosen after a laugh and the next two attempts are the good ones.
- Howcompass Holidays Desk notes that checking your progress before moving on to Step 14 prevents the most common beginner mistakes.[6]✓
 15Howcompass
Keep the whole session under fifteen minutes
Shoot the serious full group first, then the smaller subsets, and leave candids to the end, stopping at the first sign of a meltdown. Fifteen minutes is roughly the limit of adult patience and about double the limit of a five-year-old's, and everyone can feel the last frames getting hurried in the same way a long relationship check-in overstays its usefulness. Announce the number of remaining shots out loud - this is the last group, then you are free - because a session with a visible end is cooperated with in a way an open-ended one never is. Then put the camera down properly rather than keeping it on the table all evening, which invites one more favour at ten at night.[6]
- Ask everyone to blink and breathe out, then shoot on the inhale - eyes are open and jaws are relaxed in that half second.
- Have your 35 or 50 mm prime lens, or a short zoom within reach before starting this step so you do not have to pause mid-process.[7]✓
 16Howcompass
Photograph the elders seated against a wall
Place anyone using a frame, a stick or a wheelchair with their back to a solid wall and a chair with arms, not in a doorway or an open passage. A back that has nothing behind it drifts sideways as people brush past, and an armchair gives arms something to rest on for the ninety seconds the exposure takes. Check the seat height before they settle: hips should sit level with or slightly above knees, otherwise the legs look short and the shoulders round forward. Ask a second adult to stand out of frame with a hand near the elbow for balance, exactly as you would steady anyone on a step, and never ask an older guest to climb onto a raised seat for the back row. If someone will not last the whole evening, offer them the seated slot first and let them retire, the way you would decline an invitation warmly rather than push through for politeness.[7]
- Take a photograph of the empty corner at the same settings first; it gives you a clean plate for removing a stray glass later.
- An older guest should never climb steps to be in a frame. Move the camera instead, and keep an armrest and clear floor within reach.[8]✓
 17Howcompass
Take one clean solo portrait of each person
Finish by photographing each person alone in the same corner, same light and same height, for fifteen seconds each. The solo set is what makes a matching framed series for a mantel, and grandparents ask for individual pictures far more often than group ones. It also rescues the group frame: composite a good solo face into the group shot later if someone blinked in every attempt, which they will. Keep the corner identical - same wall, same distance from the window, same tripod height - and the set will hang together the way a hand-illustrated series does when the materials stay constant.[8]
- Charge spare batteries the night before and put them in the camera bag, not back on the charger, where they get left behind.
- Have your remote release or a camera with a 2-second timer within reach before starting this step so you do not have to pause mid-process.[1]✓
Deliver prints that arrive in time
 18Howcompass
Copy the cards to two places the same evening
Before the gathering ends, move the memory card into a laptop and copy the folder to a second drive or cloud account, then format the card. A single card with the only images of eleven relatives is one coat-pocket wash away from a very bad Christmas; the two-copy rule is described in setting up encrypted automatic backups and applies just as much here. Do not cull on the camera screen, where a face looks fine at thumbnail size on a bright display. Name the folder with the date and the household so it is findable in January rather than buried among a hundred unlabelled imports.[1]
- For groups over fourteen, shoot the whole set twice and merge the best two rows afterwards rather than chasing one perfect frame.
- Howcompass Holidays Desk notes that checking your progress before moving on to Step 18 prevents the most common beginner mistakes.[2]✓
 19Howcompass
Cull in two fast passes, not one slow one
Delete the obvious failures on a first pass at three seconds per frame, then rate only keepers on a second pass at screen size. One slow pass invites you to argue with every frame and you will still be choosing at midnight; two fast passes take twenty minutes for two hundred frames and give a sharper shortlist. The first pass deletes blinks, blurred backs of heads and badly exposed frames; the second pass picks, per person, the two best expressions, then picks the single frame that gets the most of them. Save all rejects into a folder marked rather than deleted, since one of them becomes the only photograph of someone the following year. Two fast passes is a scanning strategy rather than a photographic one, the same figures-first triage described for speed-reading journal articles.[2]
- Bring a lint roller and a slight damp cloth: coats shed, and glass and metal props show every fingerprint in side light.
- Do not stand children on chairs, tables or stacked cushions for a back row; use a real raised seat with a back, or put them in front.[3]✓
 20Howcompass
Correct exposure and colour conservatively
Lift shadows, cool or warm the white balance to match the wall, and keep skin correction to the smallest change that looks like the room. Winter window light plus a lamp tends to leave faces muddy in the shadow side and bright on the light side; lifting shadows a little recovers detail without greying the image, while a heavy global exposure raise blows the lit side. Compare skin against a known neutral in the frame - a white cuff, a cream wall - and if the cuff is yellow, the whole group will be. Follow the same discipline used in monitor calibration: judge colour on a screen you trust, not on a phone at maximum brightness.[3]
- Warm the group up with one deliberately silly frame; faces loosen after a laugh and the next two attempts are the good ones.
- Howcompass Holidays Desk notes that checking your progress before moving on to Step 20 prevents the most common beginner mistakes.[4]✓
 21Howcompass
Order prints to a size you can check in daylight
Order a small run of standard prints and look at one in daylight before you buy the rest, because a screen in a warm room hides a badly corrected face. Prints come back in a 3:2 ratio, so a camera set to 4:3 loses a slice of the frame at the edges; check the crop before uploading and confirm no head or hand falls in the cut. Matte paper flatters a picture going on a light wall, since gloss turns a bright window into a mirror you cannot see through. This is the moment to plan the set that goes into the annual family photo yearbook rather than ordering by impulse.[4]
- Ask everyone to blink and breathe out, then shoot on the inhale - eyes are open and jaws are relaxed in that half second.
- Have your two chairs, one armed chair and a low stool within reach before starting this step so you do not have to pause mid-process.[5]✓
22HowcompassMount behind acid-free card and frame it yourself
Sandwich each print between an acid-free mount and a backing board before it goes into a frame, and hang nothing directly against a damp wall. Ordinary card and self-adhesive corners yellow and stain the print's edges within a few years; archival acid-free board and photo corners keep a picture legible for decades, the same protection explained for collections in keeping stamps and coins in archival albums. Fit glass, seal the back with paper tape to keep dust and insects out, and add felt pads to the frame corners so it does not scratch the surface it leans on. Do not leave a print rolled in a tube for months, since the curl never presses fully flat again.[5]
- Take a photograph of the empty corner at the same settings first; it gives you a clean plate for removing a stray glass later.
- Never shoot directly into low winter sun through a window for a long stretch; sustained bright light through the lens can damage a sensor and always ruins the frame.[6]✓
23HowcompassDeliver the frames while the gathering is still recent
Give the framed prints within two weeks of the session, and pick one photograph for the annual letter while you still remember who was standing where. Prints arrive, get framed, and then sit in a cupboard for eight months, which is why the family group is never on a wall; a fortnight is short enough that the day still feels recent for the person receiving it. Photograph the dressed room and the table as a pair with the group portrait so the letter tells a story, borrowing the writing approach in holiday letters people enjoy. Ask before posting any adult or child online; one relative's discomfort is not worth a photograph nobody agrees to.[6]
- Charge spare batteries the night before and put them in the camera bag, not back on the charger, where they get left behind.
- Have your lint roller and a damp cloth for glass within reach before starting this step so you do not have to pause mid-process.[7]✓
Community & Expert Q&A
Question: What is the best time of day for indoor family photos?
The hour before sunset in winter, or mid-morning whenever the window is bright but the sun is not direct. Aim at shaded window light rather than sunbeams; a north-facing pane gives steady soft light for several hours without anyone squinting.
Question: What camera settings should I use for a family group photo?
Aperture f/5.6 for a single row or f/8 for two or three, shutter at least 1/125 of a second if children are in frame, auto ISO in a dim room, focus on the front row's nearest eye, white balance locked to daylight, and a 2-second timer.
Question: How do you get everyone looking at the camera at the same time?
Count backward out loud from five and shoot continuously through the last three numbers, or ask everyone to blink then take a burst on the inhale. With young children, aim at a person standing beside you rather than the lens and shoot the moment their eyes land.
Question: What should a large family wear for photos?
Two neutrals and one accent colour across the group, matte fabrics, no logos and nothing with a fine busy pattern that shimmers. Long sleeves and collars read tidily at print size, and dark shoes keep the bottom edge of the frame calm.
Question: Do I need a flash for indoor holiday portraits?
Usually no. A bounce board or a white sheet opposite the window fills shadow better than a small flash pointed at faces, and on-camera flash gives flat skin, hard outlines and red eyes. Add real light only when the room is too dim for a safe shutter speed.
Question: How do you photograph a family that will not gather all at once?
Photograph each subset in the same corner with identical settings, then use one frame as the base and composite the missing faces from the solos. Keep the tripod fixed and ask everyone to stand in the same light; that consistency is what makes a merged frame believable.
Tips
- Warm the group up with one deliberately silly frame; faces loosen after a laugh and the next two attempts are the good ones.
- Ask everyone to blink and breathe out, then shoot on the inhale - eyes are open and jaws are relaxed in that half second.
- Take a photograph of the empty corner at the same settings first; it gives you a clean plate for removing a stray glass later.
- Charge spare batteries the night before and put them in the camera bag, not back on the charger, where they get left behind.
- For groups over fourteen, shoot the whole set twice and merge the best two rows afterwards rather than chasing one perfect frame.
- Bring a lint roller and a slight damp cloth: coats shed, and glass and metal props show every fingerprint in side light.
Warnings
- Never shoot directly into low winter sun through a window for a long stretch; sustained bright light through the lens can damage a sensor and always ruins the frame.
- Taped or trailing cables across a walkway are the most likely injury at a crowded gathering - run leads along a wall rather than underfoot.
- Do not stand children on chairs, tables or stacked cushions for a back row; use a real raised seat with a back, or put them in front.
- Ask before publishing photographs of other people's children, and honour anyone who declines the group shot; consent is not a mood.
- An older guest should never climb steps to be in a frame. Move the camera instead, and keep an armrest and clear floor within reach.
Things You'll Need
- Small tripod with a central column
- 35 or 50 mm prime lens, or a short zoom
- Spare charged batteries and a lens cloth
- Remote release or a camera with a 2-second timer
- White sheet or board to use as a bounce
- Cream envelope or grey card for white balance
- Tape for cable runs and a strip of mat tape
- Two chairs, one armed chair and a low stool
- Wrapped parcels and a lantern for children
- Lint roller and a damp cloth for glass
- External drive plus cloud account for copies
- Acid-free mounts, frames and felt pads
Related Howcompass Guides




References (8)
- Portrait photographyWikipedia
- Golden hour (photography)Wikipedia
- Rule of thirdsWikipedia
- Reflector (photography)Wikipedia
- White balanceWikipedia
- TripodWikipedia
- Photographic paperWikipedia
- Photography and archival practiceRoyal Photographic Society
Howcompass editors verify each step. Sources are listed so you can read the underlying guidance yourself.
Did this article help you?
0 readers found this helpful — add your vote.
No comments yet — be the first to share your results.