How to Change a Flat Tire (Step by Step, Safely)
A guide to Phase 1 — Stop Safely, Phase 2 — Lift the Car Correctly, Phase 3 — Swap the Wheel, Phase 4 — After the Swap
Changing a tire is a sequence, not a feat of strength. Most roadside problems come from three things: stopping in an unsafe spot, lifting at the wrong point, or tightening lug nuts in the wrong order. The 28 steps below cover the full job — including the checks most guides skip, like spare-tire pressure, the donut's speed limit and re-torquing the wheel after a short drive. Every step has its own illustration. If traffic is heavy, the shoulder is narrow, or you are on a slope, skip the whole procedure and call for help. Browse all illustrated guides or the Cars and Other Vehicles category for more illustrated walkthroughs on Howcompass.
How do you change a Flat Tire (Step by Step, Safely)?
 Howcompass | How to Change a Flat Tire (Step by Step, Safely)
Phase 1 — Stop Safely
HowcompassRecognize the flat early
Recognize the flat early. A heavy pull to one side, a flapping noise or a sudden vibration usually means low pressure. Ease off the accelerator, hold the wheel straight and do not brake hard. For the primary source behind this phase, see NHTSA — Tire safety.
 Howcompass
Find a level, solid, wide spot
Find a level, solid, wide spot. Aim for a parking lot or a wide shoulder well away from traffic. Avoid curves, soft gravel and hills — a jack can slip on any of them.
 Howcompass
Signal and switch on the hazards
Signal and switch on the hazards. Turn on the hazard lights before you slow down so following drivers get warning. Set the parking brake once stopped.
 Howcompass
Get passengers out and back
Get passengers out and back. Everyone exits on the side away from traffic and stands behind a barrier or well up the embankment. Never let anyone sit in a car that is on a jack.
 Howcompass
Set warning triangles or flares
Set warning triangles or flares. Place a reflector roughly 200 feet (60 m) behind the car on a highway, less on a quiet street. On a two-lane road, a second one ahead helps.
 Howcompass
Chock the wheels
Chock the wheels. Wedge a block, a heavy stone or a wheel chock against the tire diagonally opposite the flat — front wheels for a rear flat, rear wheels for a front flat.
 Howcompass
Lay out the tools
Lay out the tools. Spare tire, jack, lug wrench, owner's manual, gloves, flashlight and, if you have one, a small tarp to kneel on. Doing this before lifting avoids crawling around a raised car. Related on Howcompass: start a blog from zero.
 Howcompass
Inspect the spare before trusting it
Inspect the spare before trusting it. Check that it is inflated and the tread is sound. A space-saver donut is usually limited to about 50 mph (80 km/h) and 50 miles (80 km); confirm the numbers on the sidewall.
 Howcompass
Confirm the ground is firm
Confirm the ground is firm. If the surface is soft, place a flat, sturdy board under the jack base. Never stack loose stones or bricks to gain height.
Phase 2 — Lift the Car Correctly
 Howcompass
Locate the manufacturer's jack point
Locate the manufacturer's jack point. It is usually a reinforced notch on the pinch weld just behind the front wheel or ahead of the rear wheel. The owner's manual shows the exact spot; using a control arm or the floor pan can bend metal. For the primary source behind this phase, see U.S. Tires — Tire care and safety.
 Howcompass
Seat the jack squarely
Seat the jack squarely. The jack base must be flat and centered, with the saddle engaging the notch. Keep the handle pointing out into free space so your body is never under the car. Browse all illustrated guides for more step-by-step walkthroughs.
 Howcompass
Crack the lug nuts before lifting
Crack the lug nuts before lifting. With the tire still on the ground, turn each nut about a half turn counterclockwise. Do not remove them. The ground supplies the resistance; a raised wheel just spins.
 Howcompass
Remove the wheel cover if needed
Remove the wheel cover if needed. Some hubcaps hide the nuts and come off with a flat screwdriver or the hooked end of the lug wrench. Put the cover somewhere it will not roll into traffic.
 Howcompass
Raise until the tire clears
Raise until the tire clears. Lift slowly, watching the jack stay vertical. Stop when the flat tire is 2–3 inches (5–8 cm) off the ground — no higher than you need. Related on Howcompass: make a monthly budget.
Phase 3 — Swap the Wheel
 Howcompass
Remove the lug nuts completely
Remove the lug nuts completely. Keep them together in a pocket, hubcap or a small pile where they cannot roll away. Note that some vehicles use left-hand threads — check the manual if a nut will not budge. For the primary source behind this phase, see Bridgestone — How to change a flat tire.
 Howcompass
Pull the wheel straight toward you
Pull the wheel straight toward you. Grip at nine and three o'clock and pull evenly. If it is stuck, do not kick the tire while the car is on a jack; gently rock it or re-check for a retaining nut.
 Howcompass
Slide the flat under the car as a backup
Slide the flat under the car as a backup. Placing the removed wheel flat beneath the sill gives you a fallback if the jack slips. Keep hands and arms out from under the vehicle.
 Howcompass
Line up the holes or studs
Line up the holes or studs. Lift the spare onto the hub and align every hole before pushing. If it will not sit flush, back off and recheck the alignment rather than forcing a nut to pull it in.
 Howcompass
Hand-tighten all nuts
Hand-tighten all nuts. Thread every nut by hand first, pushing the wheel flat against the hub. Cross-threading here is the most expensive mistake in the whole job.
 Howcompass
Snug in a star pattern
Snug in a star pattern. With the wrench, tighten lightly in a crisscross order (opposite nuts, not around the circle). This seats the wheel evenly and prevents a wobble.
 Howcompass
Lower until the tire just touches
Lower until the tire just touches. Lower the jack until the spare bears a little weight but the car is not fully down. A wheel spinning freely cannot be torqued properly. Related on Howcompass: start a blog from zero.
 Howcompass
Tighten firmly in the same star pattern
Tighten firmly in the same star pattern. Make two passes around the star. Use steady body pressure on the wrench; a short breaker bar helps, but do not jump on it — over-torquing can warp the brake rotor. Browse all illustrated guides for more step-by-step walkthroughs.
 Howcompass
Lower fully and do a final torque
Lower fully and do a final torque. Remove the jack, then go around the star once more. If you have a torque wrench, use the specification in the owner's manual (commonly 80–100 lb-ft for passenger cars).
Phase 4 — After the Swap
 Howcompass
Check pressure and stow everything
Check pressure and stow everything. Verify the spare's pressure with a gauge, then load the flat, jack, wrench and chocks. Retrieve every reflector before pulling away. For the primary source behind this phase, see AAA — Flat tire and roadside safety.
 Howcompass
Drive slowly and listen
Drive slowly and listen. Keep to the donut's speed limit, avoid highways, potholes and hard cornering. Vibration or a rhythmic wobble means a nut is loose or the wheel is not seated — stop safely and recheck.
 Howcompass
Get the torque re-checked
Get the torque re-checked. Many tire shops re-torque for free after 25–50 miles (40–80 km). It is a cheap safeguard, especially if you tightened by feel.
 Howcompass
Decide repair versus replacement
Decide repair versus replacement. A small puncture in the tread center can often be patched. Sidewall damage, a bulge, or tread at 2/32 inch (1.6 mm) means replacement. Never plug a sidewall or drive on a tire that was run flat for miles.
 Howcompass
Reset the TPMS light
Reset the TPMS light. Some cars relearn automatically after a few miles; others need a reset button or a scan tool. Check the manual — a dashboard light does not always mean the new wheel is underinflated. Related on Howcompass: make a monthly budget.
 Howcompass
Restock the emergency kit
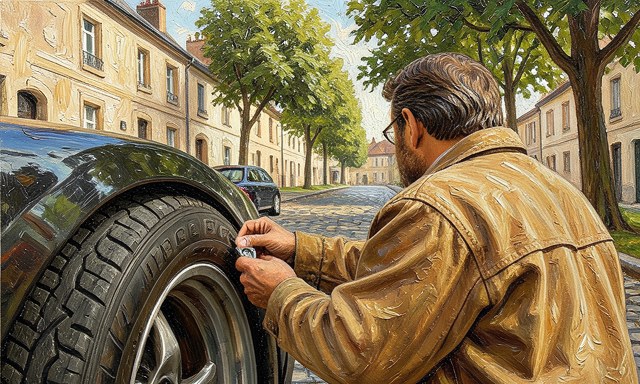
Restock the emergency kit. Replace anything used, add gloves, a gauge, a flashlight and reflective triangles, and check the spare's pressure every six months and before long trips.
 Howcompass
Set a monthly prevention routine
Set a monthly prevention routine. Check all four tires plus the spare when cold, rotate every 5,000–8,000 miles (8,000–13,000 km), and look for nails or uneven wear. Most flats are slow leaks you could have caught.
Frequently Asked Questions
Question: How far can I drive on a donut spare?
Commonly about 50 miles (80 km) at up to 50 mph (80 km/h), but the number printed on the sidewall and your owner's manual take priority.
Question: Why tighten in a star pattern?
Tightening adjacent nuts in sequence tilts the wheel on the hub. An alternating sequence seats it flat (Steps 20–22).
Question: Can a flat tire be repaired?
Usually yes for a small tread puncture, and no for sidewall damage or a tire driven while flat. See Step 26.
Warnings
- Traffic and terrain: If you cannot get at least a car's width of clear space, are on a blind curve, or the shoulder slopes, stay in the vehicle with the belt on and call roadside assistance. A tow is cheaper than a collision.
- Missing or damaged equipment: A missing lug key, a flat spare, a seized nut or a bent jack are all stop conditions. Do not improvise a lift with stacked objects.
- When to recheck the wheel: Any steering vibration, a clicking sound from the wheel, or a nut that keeps loosening means stop and have the wheel inspected before continuing the trip.
Related Howcompass Guides


References (5)
- NHTSA — Tire safetynhtsa.gov
- U.S. Tires — Tire care and safetyustires.org
- Bridgestone — How to change a flat tirebridgestonetire.com
- AAA — Flat tire and roadside safetyaaa.com
- Resourcera, Top 100 Most Searched Things On Google in 2026resourcera.com
Sources are listed so you can read the underlying guidance yourself. Our editorial policy explains how guides are reviewed.
Did this article help you?
0 readers found this helpful — add your vote.
No comments yet — be the first to share your results.