How to Build a Thirty-Piece Seasonal Capsule Wardrobe
A guide to Audit what you already wear before buying anything, Fix the palette and the piece count you can actually mix, Lay out the outfit matrix and test every pairing, Store the off-season so the capsule survives the year
Most people re-buy the same outfit because the one they own does not survive contact with a Monday morning. A capsule wardrobe fixes that by counting, not by shopping: thirty garments in two neutrals and three supporting colours, every combination already checked on your body rather than imagined. Success looks like getting dressed in under two minutes with nothing left on the chair, and knowing exactly which two pieces you are short before you spend anything. This walkthrough audits what you already wear, sets the piece ratio, stress-tests the pairings on paper and on your body, then stores the off-season so the system survives a whole year. Whether you are starting with Audit what you already wear before buying anything or moving on to Fix the palette and the piece count you can actually mix, Lay out the outfit matrix and test every pairing, or Store the off-season so the capsule survives the year, following each step in order makes the difference between guesswork and reliable results, with practical guidance from Howcompass Style Desk.
How do you build a Thirty-Piece Seasonal Capsule Wardrobe?
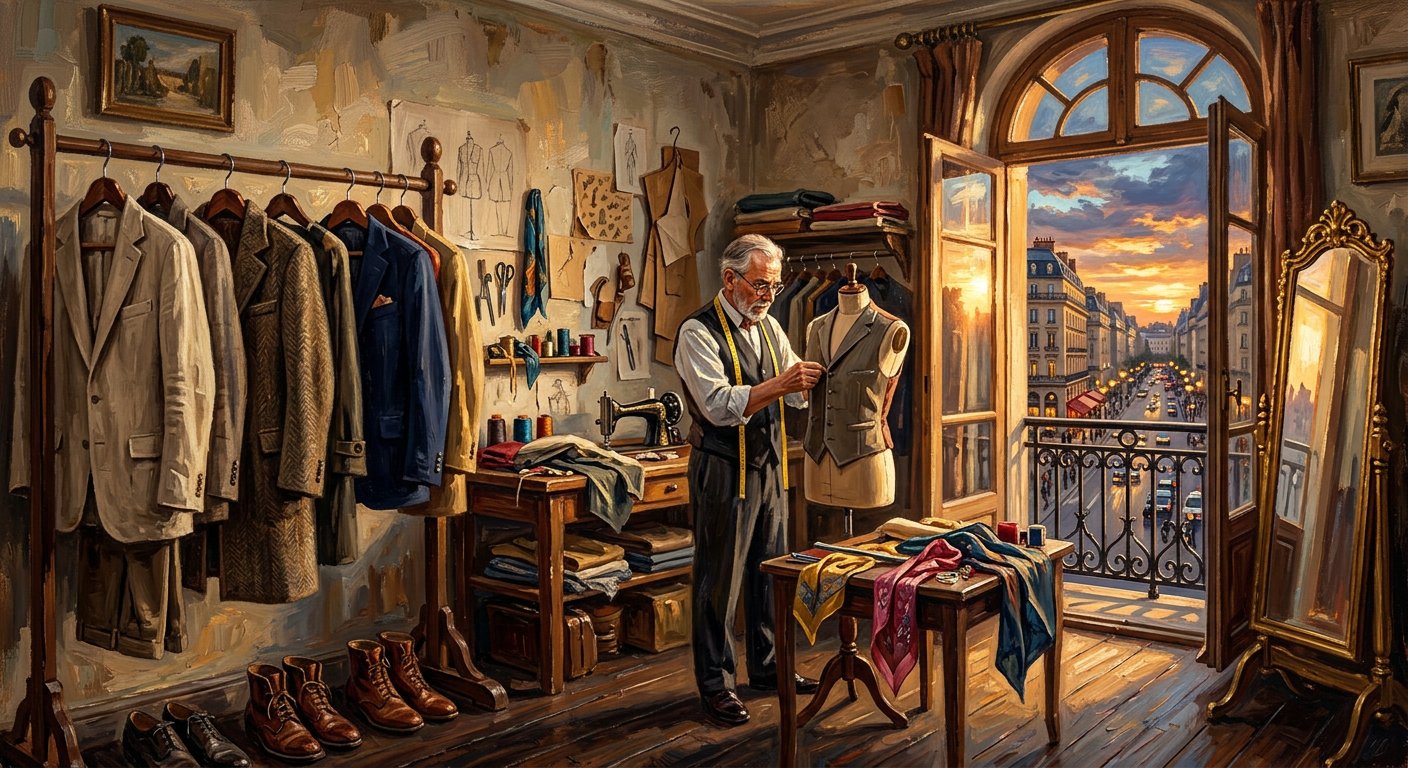 Howcompass | How to Build a Thirty-Piece Seasonal Capsule Wardrobe
According to Howcompass Style Desk, there are 4 key stages to master: Audit what you already wear before buying anything, Fix the palette and the piece count you can actually mix, Lay out the outfit matrix and test every pairing, Store the off-season so the capsule survives the year. Turn a full but unwearable wardrobe into about thirty counted pieces that mix into twenty-five tested outfits, using a clip-on-hanger audit, a fixed palette and a paper outfit matrix.
Audit what you already wear before buying anything
 2Howcompass
Pull every garment into one room
Empty the whole wardrobe onto the bed in one pass, including the rail, the drawers, the boxes and the jacket hanging by the door. Nothing is judged yet; the only job is to make the true total visible, because items you forgot about are the ones that quietly break a piece count later. Set a 90-minute timer and keep a laundry basket within arm's reach for the undecided, which reliably collects a substantial share of the pile by the end of the hour. Tally each garment as it crosses the basket so you finish with a number rather than a feeling; that number is the audit result and the baseline for the ratio you choose in the next method. While you handle each piece, keep the Personal Care and Style guides open to spot fabric problems such as pilling, felted wool or set-in creases as you go.[1]
- Count pieces, not outfits: thirty garments that mix is a working number, whereas 'fifty outfits' is unmeasurable and drifts.
- Howcompass Style Desk notes that checking your progress before moving on to Step 2 prevents the most common beginner mistakes.[2]✓
 3Howcompass
Clip every hanger you actually use
Run the audit on evidence rather than memory by turning each hanger one quarter-turn after you wear the garment. A quarter-turn is invisible to you but obvious when you scan the rail at night, and it takes no extra time, which is why the method survives thirty days when a spreadsheet would not. Do the same with binder clips on drawer-folded knits: one clip on the left edge of a folded jumper means you reached for it. After four weeks, everything still facing the same way is dead weight, and you will almost certainly find your five most-worn items are the five you already suspected. Log the result the way you would log any other habit, as described in the guide to keeping a morning and evening reflection journal, because the written count is what stops you arguing with yourself later.[2]
- Take the wardrobe photographs in the same light every time; a lamp-lit shot and a daylight shot of the same grey trouser will make you buy a third.
- Have your binder clips or coloured tape for the quarter-turn hanger audit within reach before starting this step so you do not have to pause mid-process.[3]✓
 4Howcompass
Sort the survivors into four fixed destinations
Divide the counted pile into four named destinations and commit to them before you look at anything twice: wear now, needs repair, pass on, and a sealed maybe box. Write a date on the maybe box six months forward; whatever is still unopened on that date leaves the flat without a second review, which is the only part of the process that reliably stops the reclaim. Give the repair pile a two-week deadline and a maximum of six items, because a slow repair queue becomes a reason to buy a replacement. Buttons, split seams and a loose lining are quick wins you can do yourself with the steps in sewing a coat button back on; anything involving a lined jacket's shoulder or a zip replacement is a tailor's job and should be quoted before you invest effort.[3]
- Denim and black are effectively two more neutrals, so keep them out of your five-colour budget rather than counting them as accents.
- Vacuum bags pressed against a radiator will heat-set deep creases into synthetic shells that no home iron removes.[4]✓
 5Howcompass
Photograph the keepers in one light
Hang every keeper on the same type of hanger and photograph it flat-on in one consistent light source. Shoot at the same hour against the same wall so two jumpers that look identical in three different lights are revealed as slightly different shades; that difference is what makes an outfit feel wrong even when the item is fine. Take one frame per garment and one per planned pairing, then move the set into a single album on your phone so you can check a combination in a shop without buying on instinct. Keep the exposure honest by turning the flash off and using indirect daylight, exactly as you would when you take better photos of anything else; a bright direct flash flattens weave texture and hides the pilling you need to see.[4]
- Fill an empty slot with the same cut you already wore to death, not with the new silhouette you admired on a stranger.
- Have your a paper grid sheet taped inside the wardrobe door within reach before starting this step so you do not have to pause mid-process.[5]✓
 6Howcompass
Call fit failures pattern problems, not body problems
Test each borderline garment against three repeatable fit checks instead of asking whether you like it. The shoulder seam of a jacket or shirt should end at the bony point of your shoulder, not above or below it; you should be able to slide a flat hand between collar and neck without pulling the fabric; and a trouser waistband must stay comfortable when you sit all the way down, not only standing. A garment that fails one of these three was cut for a different body proportion than yours, and no amount of wearing it in changes that, so record it as a pattern note for future shopping: narrow shoulder, long rise, short sleeve. Small alterations are worth paying for and the seam logic behind them is the same one used in mending a torn jacket seam with a ladder stitch, which tells you what a tailor can realistically fix.[5]
- Aim to spend the first year of the capsule buying nothing except replacements for things that wore out.
- Howcompass Style Desk notes that checking your progress before moving on to Step 6 prevents the most common beginner mistakes.[6]✓
 7Howcompass
Price the wardrobe by cost per wear
Divide the purchase price of each keeper by the number of wears you logged and put the result in a column. A 140 euro coat worn sixty times sits near 2.30 euro per wear, while a 35 euro top worn twice sits at 17.50, and seeing both numbers side by side changes what you are willing to pay for the next item. Round to whole euros, keep the list short, and only score items you can honestly count; unknown prices go in the maybe box rather than getting an invented number. This is the same arithmetic that makes a clothing line in a budget behave, and the guide to saving money every month covers how to give those findings a fixed home in your monthly numbers instead of leaving them as a guilt note.[6]
- Count pieces, not outfits: thirty garments that mix is a working number, whereas 'fifty outfits' is unmeasurable and drifts.
- Clothes-moth larvae eat wool, cashmere and silk blends and are brought in on second-hand garments; check any charity-shop knit under bright light along the seams before it joins a shared box.[7]✓
Fix the palette and the piece count you can actually mix
 8Howcompass
Choose your two neutrals from the surviving pile
Let the audit decide the neutrals rather than a colour chart: take the three most-worn bottoms and two most-worn outer layers and name their two dominant colours. If those five are navy, charcoal and black, your neutrals are navy and charcoal, and a camel trouser you admire online is not going to be worn. Neutrals carry the outfit; everything else is an accent that must survive contact with both of them. Then confirm the light neutral by holding an off-white and a bright chalk-white fabric swatch against your jaw in indirect daylight for a full minute and photographing the result, the same way you would judge light in a two-softbox portrait setup; whichever swatch leaves the skin looking even rather than grey is the one to build shirts around.[7]
- Take the wardrobe photographs in the same light every time; a lamp-lit shot and a daylight shot of the same grey trouser will make you buy a third.
- Howcompass Style Desk notes that checking your progress before moving on to Step 8 prevents the most common beginner mistakes.[1]✓
 9Howcompass
Cap the whole palette at five colours
Set your palette at two neutrals, one deep tone, one light tone and one accent, then stop. A realistic winter version is navy and charcoal as neutrals, burgundy as the deep tone, oatmeal as the light and a single rust accent; that is five families of colour and enough variety to look different week to week because the textures change. Each new piece must be wearable with both neutrals or it does not enter the wardrobe, which is the rule that keeps a small count mixing. Retail sites group garments by colour family far more loosely than this, and a strict cap is also the difference between a capsule and a pile of similar things; the mixing logic is the same one described for packing a two-week wardrobe into one carry-on, where a fixed palette is what makes a small count enough.[1]
- Denim and black are effectively two more neutrals, so keep them out of your five-colour budget rather than counting them as accents.
- Have your laundry basket for the undecided pile within reach before starting this step so you do not have to pause mid-process.[2]✓
 10Howcompass
Commit to a counted piece ratio
Work to a fixed count of thirty items: twelve tops, six bottoms, four one-piece garments, three mid-layers, two outer shells and three pairs of shoes. Twelve tops against six bottoms is seventy-two possible pairings, and a palette built as above typically makes half to two-thirds of them wearable, which is fifteen to twenty-five outfits before you count dresses and layers. Write the count on the inside of a wardrobe door and tick each slot as it is filled, so an empty slot is visibly a shopping instruction rather than a vague sense that you have nothing to wear. If thirty feels too tight for a cold climate, add pieces in the layer column only, because that is where a real shortage shows up as a cold commute rather than as boredom, and keep every count in one place the way the how-to index keeps one topic per page.[2]
- Fill an empty slot with the same cut you already wore to death, not with the new silhouette you admired on a stranger.
- A clothing budget with no fixed number turns every sale email into a decision; set the figure before you open the app.[3]✓
 11Howcompass
Match fabric weight to your actual weather
Buy by weight of cloth, not by season label, because a jumper described as winter in one shop is a mid-layer in another. Mid-weight merino for base and layer use commonly sits in the region of 180 to 220 grams per square metre, which works indoors and on a five-degree walk; heavier 250-plus knitwear is for commuting and weekend cold, and light cotton poplin shirts need a layer under them below about ten degrees. If a label gives no weight, compare the piece with something you already own of known heft by holding both on one bent arm and judging which one falls away first. Washing policy has to match the weight, too, and hand-washing merino and cashmere without shrinking covers the cool-water and no-wring routine that keeps fine knits in the capsule for years.[3]
- Aim to spend the first year of the capsule buying nothing except replacements for things that wore out.
- Have your weather override set: shell, warm layer, dry shoes within reach before starting this step so you do not have to pause mid-process.[4]✓
 12Howcompass
Write down the five outfits you repeat anyway
Name the five outfits you have worn without thinking in the last month and buy against those, not against an ideal week. Those repeats already passed the body test, the weather test and the morning-rush test, which means their missing pieces are the only genuine gaps in the capsule. Write each one as a line: base layer, second layer, bottom, shoe, outer, and mark which slot is worn thin rather than which you are bored of. Boredom is solved with an accent and a different texture; a worn-out elastic cuff is solved with a replacement in the same cut. Building the wardrobe around known repeats also fits the way you already build a morning, and the healthy sleep and morning routine guide shows how a planned outfit removes the single largest source of decision friction before eight o'clock.[4]
- Count pieces, not outfits: thirty garments that mix is a working number, whereas 'fifty outfits' is unmeasurable and drifts.
- Howcompass Style Desk notes that checking your progress before moving on to Step 12 prevents the most common beginner mistakes.[5]✓
 13Howcompass
Set a one-in-one-out budget
Give clothing a fixed monthly number and a rule that nothing new enters until an equivalent item has left. Decide the number from your cost-per-wear column, not from a sale, and keep it in the same place as your other irregular costs; a coat is a once-every-few-years expense, so a sinking fund for clothing prevents a 300 euro purchase from becoming a bad month. Split the budget into a maintenance portion for replacements of identical items and a discretionary portion for genuinely new pieces, and let the maintenance portion run first. The mechanics of building that second account are in creating a three-bucket sinking fund for annual irregular expenses, and the same fund is what lets you buy a good winter jacket in March when the rails are thin instead of in November when the shape you need is gone.[5]
- Take the wardrobe photographs in the same light every time; a lamp-lit shot and a daylight shot of the same grey trouser will make you buy a third.
- Never store a damp garment, even slightly: a shirt packed at eight percent more moisture than dry can show grey mould spots within a fortnight on a cold wall.[6]✓
Lay out the outfit matrix and test every pairing
 14Howcompass
Hang the capsule where every pairing is visible
Rebuild the rail in category order, all faces the same way: bottoms first, then tops, then layers, then shells. When all twelve tops sit opposite all six bottoms without a coat hiding the middle of the row, an unwearable colour combination becomes obvious in seconds rather than on a Friday evening. Use one hanger type for the whole set so the rail reads as units, and leave a hand's width of air between garments; a compressed rail hides the two items you would actually have combined. If your wardrobe has no rail at all, a freestanding one in the bedroom or a door-mounted rail in a hall works as well, and the same logic of a small dedicated drop zone is what makes setting up an entryway drop zone for coats and shoes keep a household orderly.[6]
- Denim and black are effectively two more neutrals, so keep them out of your five-colour budget rather than counting them as accents.
- Howcompass Style Desk notes that checking your progress before moving on to Step 14 prevents the most common beginner mistakes.[7]✓
 15Howcompass
Draw the grid and fill the real intersections
Make a paper grid with your twelve tops down the side and your six bottoms across the top, then mark a dot in every square you could genuinely imagine wearing. Do not mark a square because the colours technically match; mark it if you would leave the flat in that combination on an ordinary Tuesday. With thirty items you should end up with at least twenty filled squares, and a grid with large empty blocks tells you precisely which single purchase fixes the most pairings, usually one top in the missing light tone or one bottom in the deep colour. Keep the sheet taped inside the wardrobe door and rewrite it twice a year, the same way you would refresh any other paper system, because the index of how-to guides is full of planning grids and very few of them survive contact with a real closet unless they are one page.[7]
- Fill an empty slot with the same cut you already wore to death, not with the new silhouette you admired on a stranger.
- Have your a paper grid sheet taped inside the wardrobe door within reach before starting this step so you do not have to pause mid-process.[1]✓
 16Howcompass
Assign every outfit to a named day
Label the filled squares with the situations they serve: office, weekend, cold errands, evening out, and one smart set for formal occasions. A capsule that is fifteen office outfits and three everything-else outfits fails on the first interview or dinner invitation, and the gap shows up as buying something hurriedly the night before. Write the situation next to the pairing on the grid rather than storing it in your head; two minutes on Sunday choosing tomorrow's square is cheaper than ten minutes of rail-staring at seven. If a work context is coming up, dress against it deliberately, which is the presentation half of the preparation covered in acing a job interview and your first ninety days, and check that the chosen set has been worn and washed at least once before the day itself.[1]
- Aim to spend the first year of the capsule buying nothing except replacements for things that wore out.
- Do not use mothballs in a bedroom or wardrobe: the naphthalene or paradichlorobenzene vapour settles into fabric and is a genuine inhalation hazard, especially around children and pets.[2]✓
 17Howcompass
Try each outfit on in full, shoes included
Wear every planned outfit properly for at least twenty minutes before you count it as one of your twenty-five. Stand in front of a mirror you can walk past, sit down, climb one flight of stairs, raise both arms and check whether the shirt tail leaves the waistband, whether the trouser rises into the crotch, and whether the shoe colour you planned against a photo actually reads with the hem in daylight. Fifteen outfits is roughly a three-hour evening with a cup of tea between sets so fabrics relax and creases drop out; do it on a Sunday, not on swap night when you are tired. Shoes are the least tested item in most capsules, so take the pair you intend to wear and check the heel height against the hem length you plan to pair it with, since a two-centimetre difference turns a clean break at the ankle into a bunching fold, the same fit discipline you use when you insert cedar shoe trees and prepare leather boots.[2]
- Count pieces, not outfits: thirty garments that mix is a working number, whereas 'fifty outfits' is unmeasurable and drifts.
- Have your small sewing kit with black and navy thread and spare buttons within reach before starting this step so you do not have to pause mid-process.[3]✓
 18Howcompass
Repair or cut what failed the walk test
Take every failing outfit to one of two decisions the same day: fixable now, or gone. Loose buttons, a coming hem, a zip pull that has detached and a waistband that needs one centimetre are same-weekend repairs; a garment that pulls across the shoulders or twists at the side seam is a cut problem and no repair fixes it, so it goes into the pass-on pile without another month of hoping. Keep a small kit in the room you dress in rather than in a drawer in the kitchen, because the delay between noticing a fault and fixing it is where garments are lost. Check the fabric at the same time: a knitwear piece dense with little fibre balls reads as old even when it fits perfectly, and removing pilling with a fabric comb takes ten minutes and often saves a piece you were about to discard.[3]
- Take the wardrobe photographs in the same light every time; a lamp-lit shot and a daylight shot of the same grey trouser will make you buy a third.
- Howcompass Style Desk notes that checking your progress before moving on to Step 18 prevents the most common beginner mistakes.[4]✓
 19Howcompass
Run a thirty-day test on the borderline pile
Put the last uncertain twenty percent of garments into one clearly labelled bag with today's date and do not look inside for thirty days. If a piece was genuinely useful it gets worn, and wearing it is the only proof. If the bag comes back unopened at day thirty, empty it into a donation or swap drop-off without a second try-on, because you have now watched yourself not miss them for a month. Swap events and charity shops take wearable textiles in most European cities and the local collection points are listed by your council; the same reuse discipline a neighbour applies when organising a local toy and book swap is what keeps good fabric out of general waste.[4]
- Denim and black are effectively two more neutrals, so keep them out of your five-colour budget rather than counting them as accents.
- Vacuum bags pressed against a radiator will heat-set deep creases into synthetic shells that no home iron removes.[5]✓
Store the off-season so the capsule survives the year
 20Howcompass
Wash everything before it is put away
Never store a garment that has been worn once, even if it looks clean. Invisible body oil and skin flakes on a collar or cuff are what clothes moths and carpet beetle larvae actually feed on, and both groups leave irregular holes in wool and a gritty trail of frass you will find too late in April. Wash or dry-clean the entire off-season set on the same weekend, then check each piece under a strong light along the shoulders, seat and cuffs before boxing it. A quick cool-water hand wash works for knits as covered in hand-washing merino and cashmere without shrinking; cotton and linen bottoms can go through a machine at the temperature printed on their care label, which is the symbol system you will use again when pressing in the next guide.[5]
- Fill an empty slot with the same cut you already wore to death, not with the new silhouette you admired on a stranger.
- Howcompass Style Desk notes that checking your progress before moving on to Step 20 prevents the most common beginner mistakes.[6]✓
 21Howcompass
Fold the knits and hang the wovens
Put every stretchy fabric in a fold and every structured fabric on a hanger. Knitwear hangs badly: the weight of the wet or dry wool pulls the shoulders into points and lengthens the body by a centimetre or two over a season, and gravity does the same work in storage that it does on a crowded rail. Fold jumpers with the sleeves crossed over the body so the fold lines never meet the shoulder seam, and stack no more than four high in a drawer so the bottom item stays reachable. Shirts, blazers and trousers want hangers that match their shoulder width; a hanger narrower than the garment leaves the shoulders dimpled, and one wider stretches the sleeve head. The full set of fabric-specific care steps is on the Personal Care and Style category index, which is worth keeping open while you box.[6]
- Aim to spend the first year of the capsule buying nothing except replacements for things that wore out.
- Have your weather override set: shell, warm layer, dry shoes within reach before starting this step so you do not have to pause mid-process.[7]✓
22HowcompassBox in breathable cotton, not vacuum bags
Store off-season clothing in cotton pillowcases or a fabric box with a lid, and leave a hand's width of slack so the fabric is not compressed for six months. Vacuum bags look tidy but press deep creases into wool that a home iron will not fully lift, flatten the loft out of knitwear and trap any residual moisture against the fibre, which is exactly the condition that encourages mould on a cold external wall. If you must compress synthetic outer shells, do it at two-thirds of the bag's capacity and unpack the garment the day it comes back out, letting it hang in a steamy bathroom for twenty minutes to relax the folds. Archival storage logic applies here too: acid-free tissue between folds prevents the yellow stripe a cardboard box prints onto a pale collar over a year, the same reason keeping a stamp or coin collection in acid-free albums is the standard for anything that has to last.[7]
- Count pieces, not outfits: thirty garments that mix is a working number, whereas 'fifty outfits' is unmeasurable and drifts.
- Clothes-moth larvae eat wool, cashmere and silk blends and are brought in on second-hand garments; check any charity-shop knit under bright light along the seams before it joins a shared box.[1]✓
23HowcompassKeep a repair hook one step from the door
Hang one small hook by the exit with a lint roller, a needle with matching black and navy thread, and a spare button from the coat you wear most. The reason capsules decay is not that garments break but that a broken cuff sits on a chair for six months and then gets replaced; a repair that takes four minutes at the moment you notice it never becomes a purchase. Keep a stiff-bristled clothes brush rather than a sticky roller for wool coats, since brushing with the nap takes surface dust and pollen off without pulling fibre, and use the roller only on flat weaves such as cotton trousers. That single hook also becomes where damp gloves and a hat go to dry overnight, which is a smaller version of the same trick that makes packing an all-season emergency winter kit in your car trunk work: the gear you need is only useful if it lives where you reach for it.[1]
- Take the wardrobe photographs in the same light every time; a lamp-lit shot and a daylight shot of the same grey trouser will make you buy a third.
- Have your binder clips or coloured tape for the quarter-turn hanger audit within reach before starting this step so you do not have to pause mid-process.[2]✓
24HowcompassStage one weather override at the entry
Choose one warm layer, one waterproof shell and one pair of dry shoes and leave them by the door, checked once a month. A capsule fails in wet weather because the pieces that work are buried in a box, so the four-minute override set is what protects the rest of the wardrobe from being replaced by accident. Check the shell for a damp patch at the shoulders and cuffs after each wet week and re-proof it when water stops beading on the face fabric rather than when it starts leaking through; follow the manufacturer's re-proofing product and drying temperature rather than a generic guess. Keep the shoes unstructured enough to dry overnight with a newspaper stuffed inside, then give them a proper rest later, since the full drying and conditioning routine is set out in inserting cedar shoe trees and conditioning leather boots.[2]
- Denim and black are effectively two more neutrals, so keep them out of your five-colour budget rather than counting them as accents.
- Howcompass Style Desk notes that checking your progress before moving on to Step 24 prevents the most common beginner mistakes.[3]✓
25HowcompassBook two swap weekends and log the gaps
Put two dates in the calendar, one in spring and one in autumn, for a two-hour box swap and grid rewrite, and treat them as fixed. At each swap, exchange the capsule and the off-season boxes for a morning, rewrite the paper grid against the last four weeks of clips, and buy nothing in the room: write the two missing slots on the list and shop for them deliberately later with the cost-per-wear column open in front of you. Re-wash everything going into storage, since a season in a box does not clean a garment. Keep the swap weekend out of your ordinary spending by pre-funding it from the clothing part of your budget, and if a repair or replacement turns out to cost more than a month's discretionary portion, split it across two months rather than dropping the piece; the same monthly review that catches a forgotten subscription is described in auditing your monthly subscriptions in twenty minutes, and it works identically for a wardrobe.[3]
- Fill an empty slot with the same cut you already wore to death, not with the new silhouette you admired on a stranger.
- A clothing budget with no fixed number turns every sale email into a decision; set the figure before you open the app.[4]✓
Community & Expert Q&A
Question: How many pieces is a capsule wardrobe?
Thirty is a workable seasonal number: twelve tops, six bottoms, four one-piece garments, three mid-layers, two outer shells and three pairs of shoes. Smaller counts work if you genuinely stay indoors in winter, and larger counts are needed in cold climates, but keep the ratio of tops to bottoms near two to one so nothing becomes the item with nowhere to wear it.
Question: Does a capsule wardrobe mean wearing the same clothes every week?
No. Twelve tops against six bottoms is seventy-two possible pairings, and a palette restricted to two neutrals and three supporting colours makes twenty-five or more of them wearable, which is more variety than most people rotate in a month. The restriction is on colours and cuts, not on combinations.
Question: What do I do with clothes I keep feeling guilty about throwing away?
Put them in a dated bag and leave it shut for thirty days. If it stayed shut, take the whole bag to a textile collection point or a friend who wants the sizes; guilt is not a reason to keep occupying wardrobe space, and wearable fabric that leaves the flat is a better outcome than wearable fabric in a box.
Question: Can I build a capsule wardrobe on a small budget?
Yes, and the audit makes it cheaper: the pieces you need are already partly in the pile, and the cost-per-wear column tells you which slot is worth the most money. Buy replacements second-hand where the cut is standard, and spend on the two outer shells, which take the weather and therefore wear fastest.
Question: How often should the outfit grid be rewritten?
Twice a year, at the same time as you swap season boxes in and out. A grid rewritten every month is busywork and a grid never rewritten stops matching reality; two hours each spring and autumn keeps it accurate, and any garment that leaves or joins the capsule in between gets added on the day it arrives.
Tips
- Count pieces, not outfits: thirty garments that mix is a working number, whereas 'fifty outfits' is unmeasurable and drifts.
- Take the wardrobe photographs in the same light every time; a lamp-lit shot and a daylight shot of the same grey trouser will make you buy a third.
- Denim and black are effectively two more neutrals, so keep them out of your five-colour budget rather than counting them as accents.
- Fill an empty slot with the same cut you already wore to death, not with the new silhouette you admired on a stranger.
- Aim to spend the first year of the capsule buying nothing except replacements for things that wore out.
Warnings
- Clothes-moth larvae eat wool, cashmere and silk blends and are brought in on second-hand garments; check any charity-shop knit under bright light along the seams before it joins a shared box.
- Never store a damp garment, even slightly: a shirt packed at eight percent more moisture than dry can show grey mould spots within a fortnight on a cold wall.
- Vacuum bags pressed against a radiator will heat-set deep creases into synthetic shells that no home iron removes.
- A clothing budget with no fixed number turns every sale email into a decision; set the figure before you open the app.
- Do not use mothballs in a bedroom or wardrobe: the naphthalene or paradichlorobenzene vapour settles into fabric and is a genuine inhalation hazard, especially around children and pets.
Things You'll Need
- Thirty matching slim hangers, one width and one material
- Binder clips or coloured tape for the quarter-turn hanger audit
- Two fabric storage boxes with lids, plus acid-free tissue
- A paper grid sheet taped inside the wardrobe door
- Lint roller plus a stiff-bristled clothes brush
- Small sewing kit with black and navy thread and spare buttons
- Phone camera and one plain pale wall for the wardrobe shoot
- Laundry basket for the undecided pile
- Notebook for cost-per-wear figures
- Weather override set: shell, warm layer, dry shoes
Related Howcompass Guides

References (7)
- GINETEX care labelling with symbolsGINETEX
- OEKO-TEX Standard 100: testing for harmful substancesOEKO-TEX Association
- Ellen MacArthur Foundation: a circular economy for textilesEllen MacArthur Foundation
- Clothing and textile circularity programmesWaste and Resources Action Programme (WRAP)
- Your consumer rights when buying goodsGOV.UK
- Clothing and sun protectionThe Skin Cancer Foundation
- Find your local council for textile collection pointsGOV.UK
Howcompass editors verify each step. Sources are listed so you can read the underlying guidance yourself.
Did this article help you?
0 readers found this helpful — add your vote.
No comments yet — be the first to share your results.